Wine cap mushrooms (Stropharia rugoso-annulata) are a fantastic species to cultivate, especially for beginners. Often referred to as the “garden giant” due to their large size, these mushrooms have beautiful wine-colored caps and a robust flavor. Best of all, they don’t require a lot of space or ultra-specialized growing material – just some wood chips, straw, and, of course, the mushroom spawn.
This guide covers the step-by-step process of growing wine caps at home, from understanding their lifecycle basics to creating optimal indoor and outdoor growing conditions.
Remember, patience and experimentation are key to mastering the art of mushroom cultivation. Enjoy the process, savor the experience, and don’t get frustrated if it doesn’t work how you want it to. This is the nature of growing anything; sometimes, things do not go to plan.
But, with a successful grow, not only do you get to enjoy the fruits of your labor in the form of delicious mushrooms, but if you’re growing outdoors, you also contribute to the health of your garden and the larger ecosystem. Happy growing!
- Scientific Name: Stropharia rugoso-annulata
- Common Names: Wine Cap, Garden Giant, King Stropharia
- Habitat: Mulch, wood chips, compost
- Edibility: Edible
Interested in more mushroom growing? Check out our guide to indoor mushroom growing kits.
Jump to:
- All About Wine Cap Mushrooms
- The Benefits of Growing Wine Caps
- Wine Cap Mushroom Lifecycle
- Wine Cap Cultivation: Indoor vs. Outdoor
- Choosing A Substrate
- The Ideal Growing Environment For Wine Caps
- Buying Wine Cap Spawn
- Growing Wine Cap Mushrooms In Outdoor Beds, Step By Step
- Indoor Wine Cap Mushroom Cultivation, Step By Step
- Experimenting with Wine Cap Cultivation
- Cooking With Wine Cap Mushrooms
- Common Questions About Wine Cap Mushrooms
All About Wine Cap Mushrooms
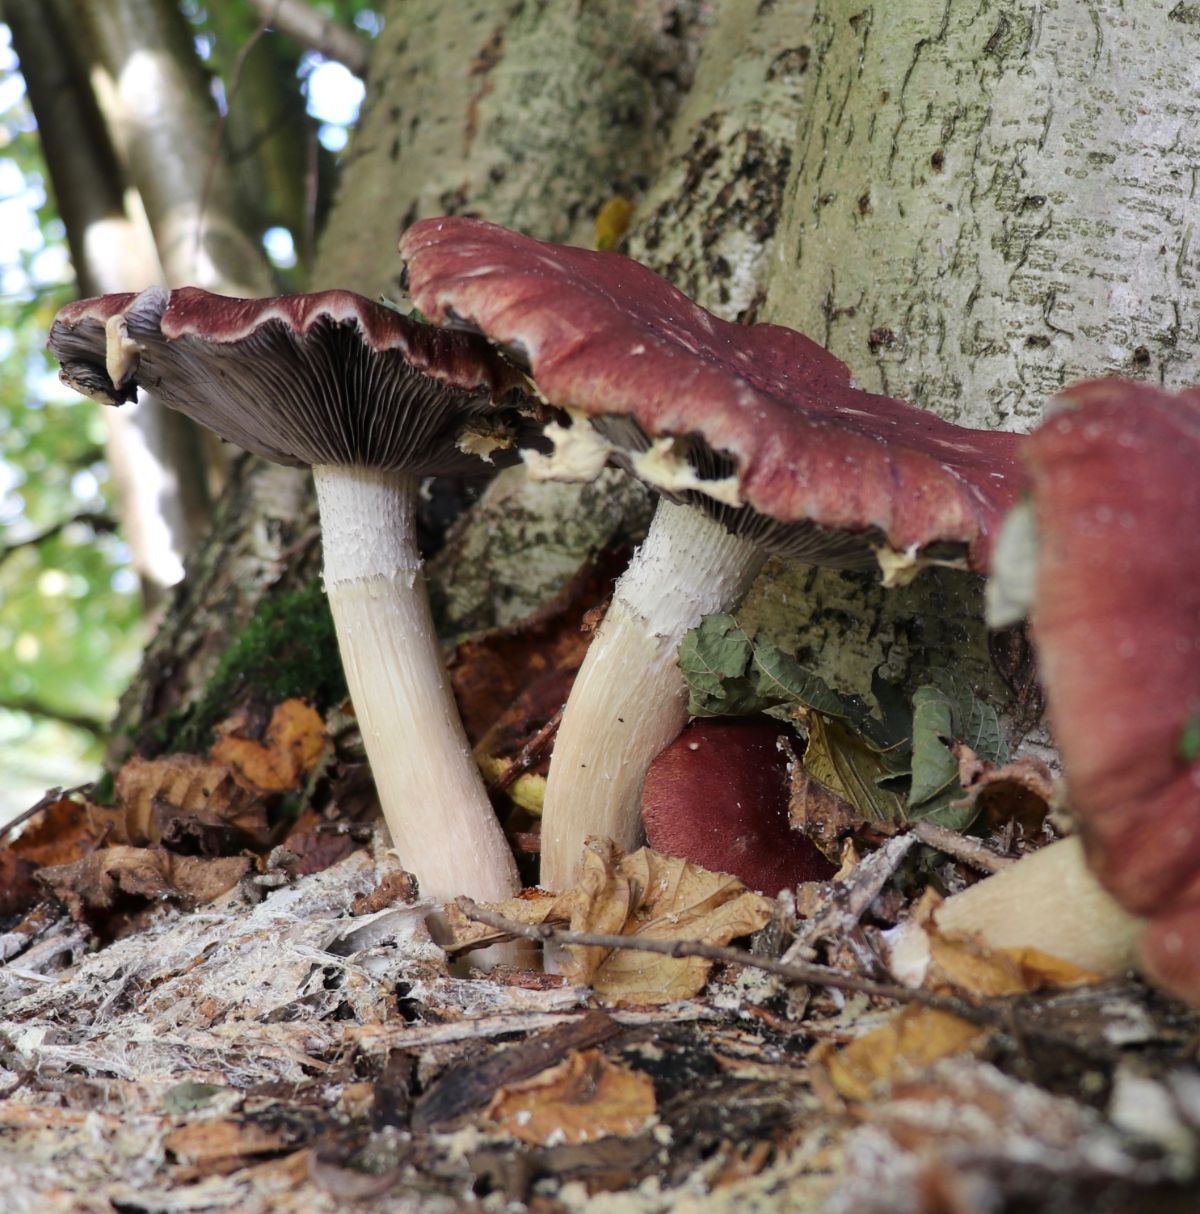
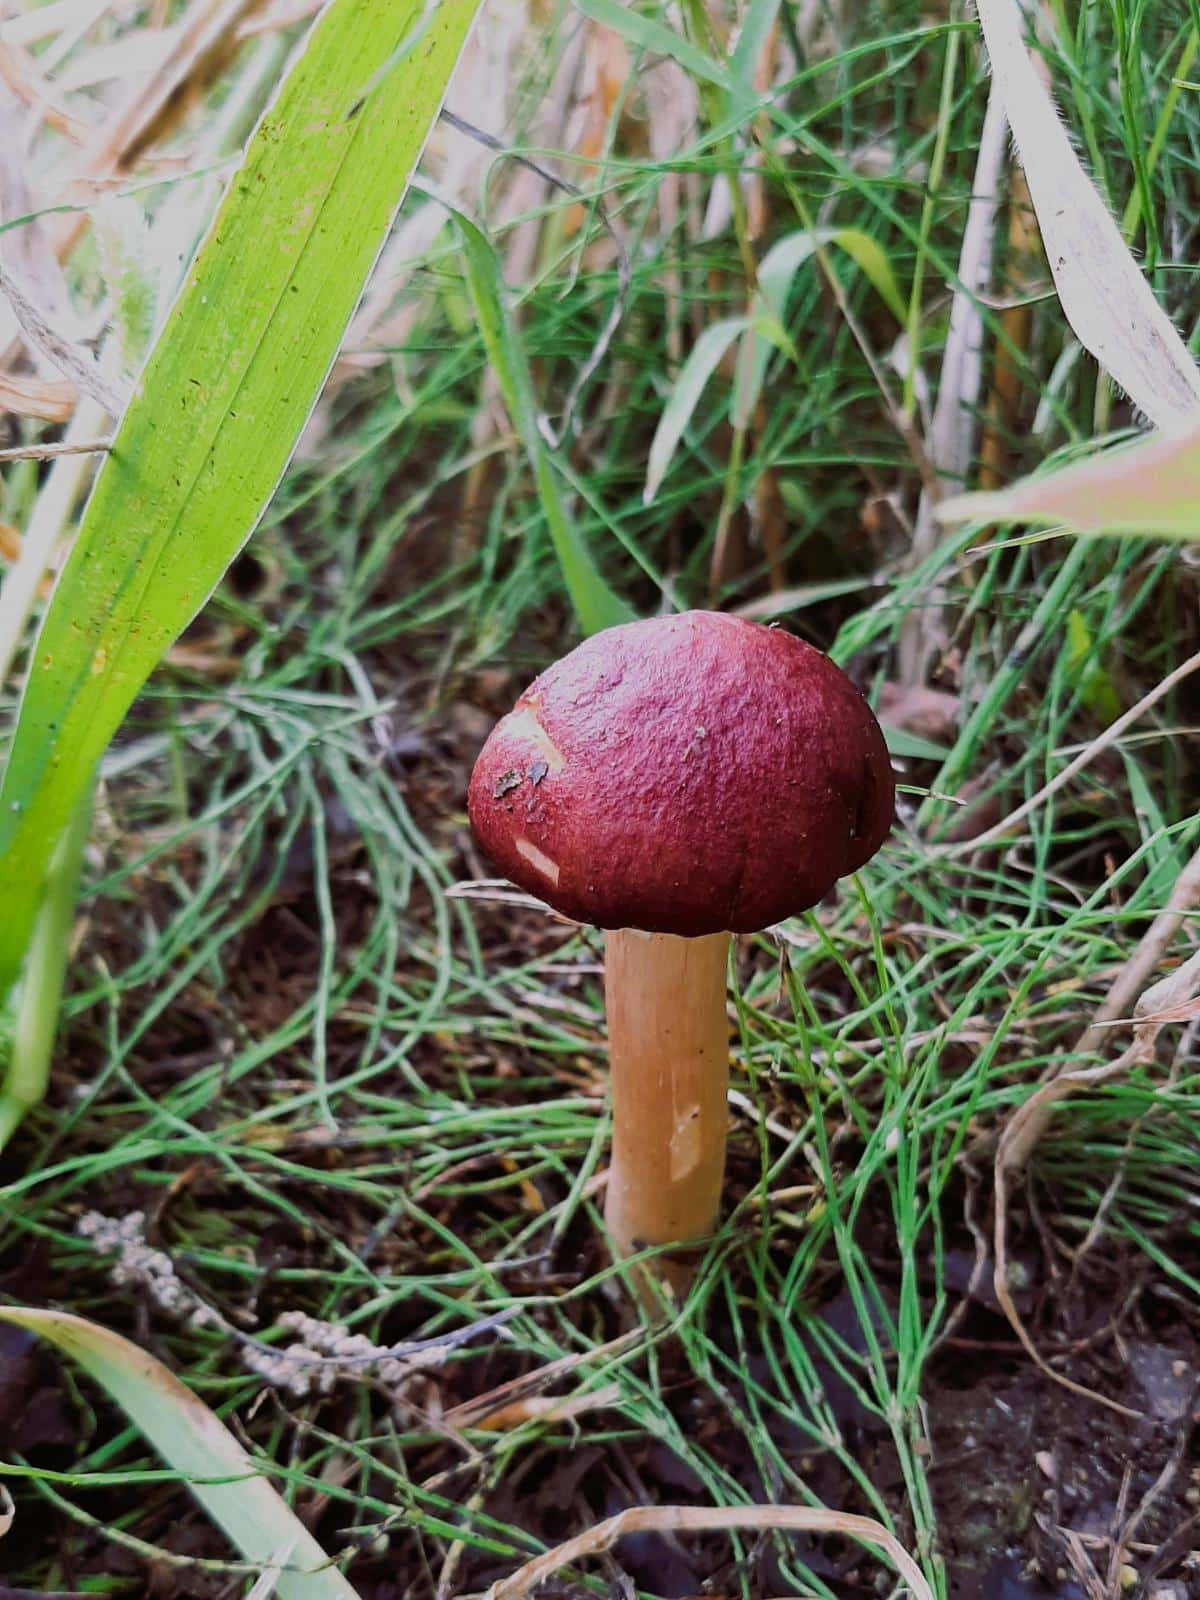
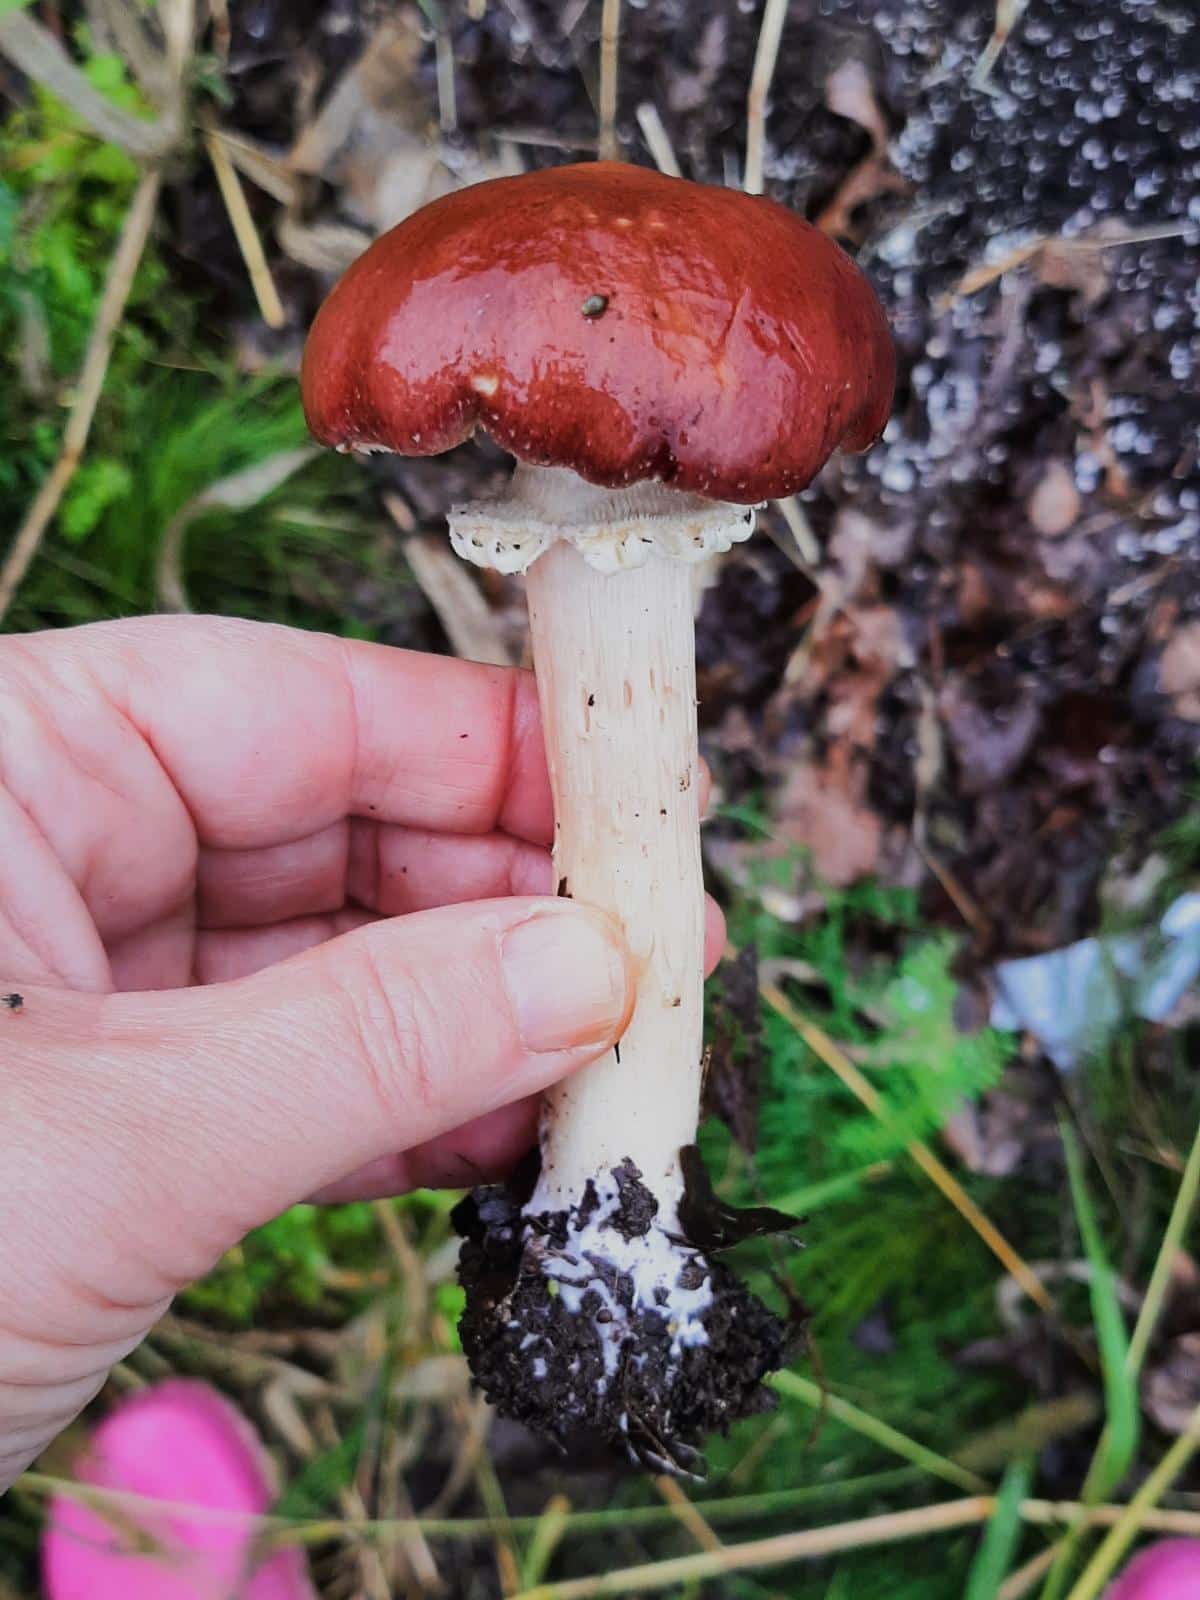
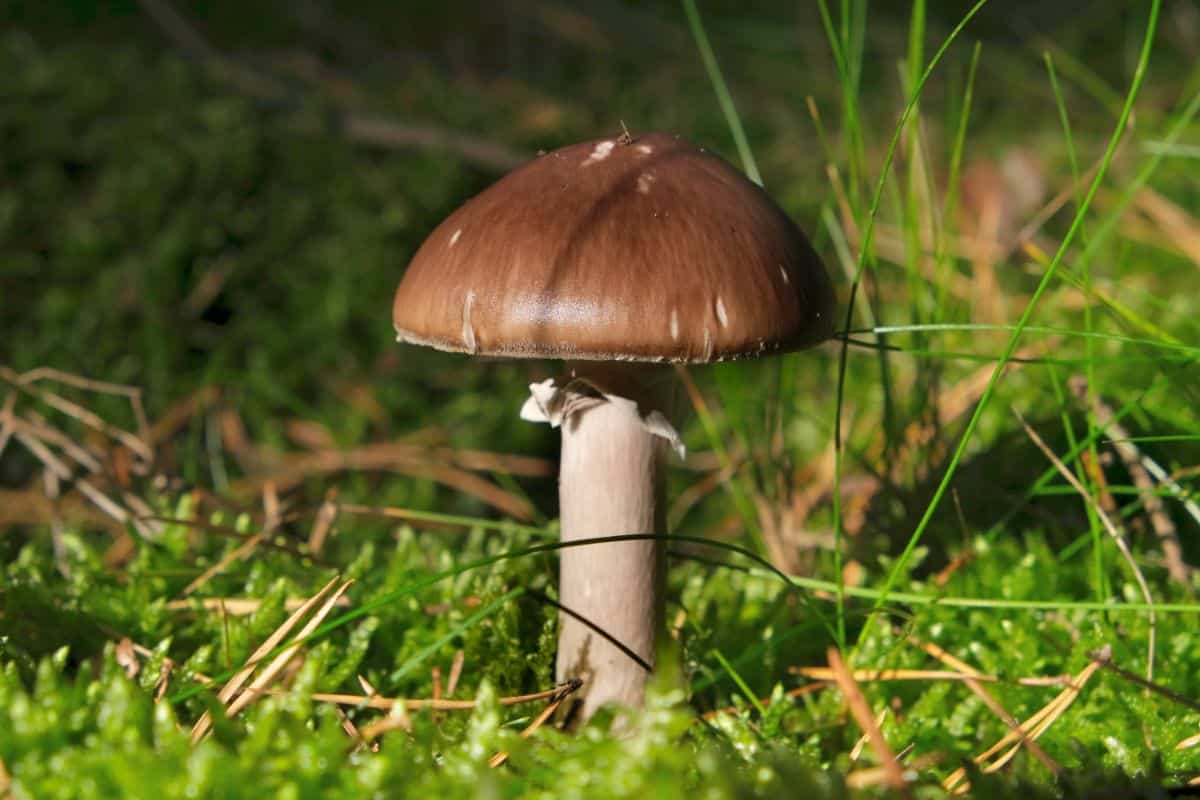
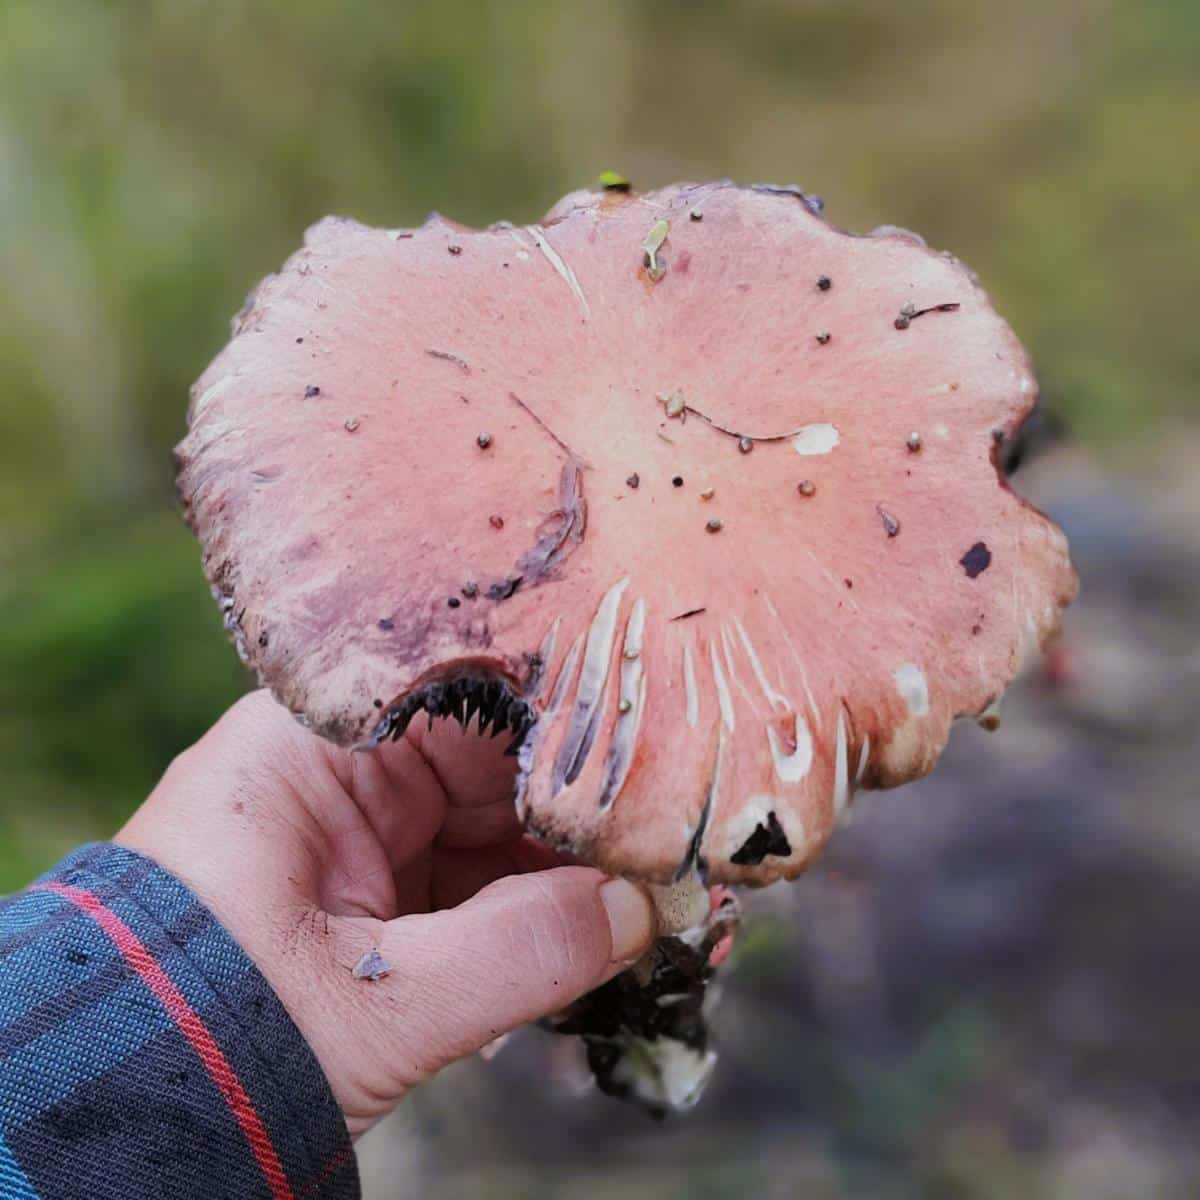
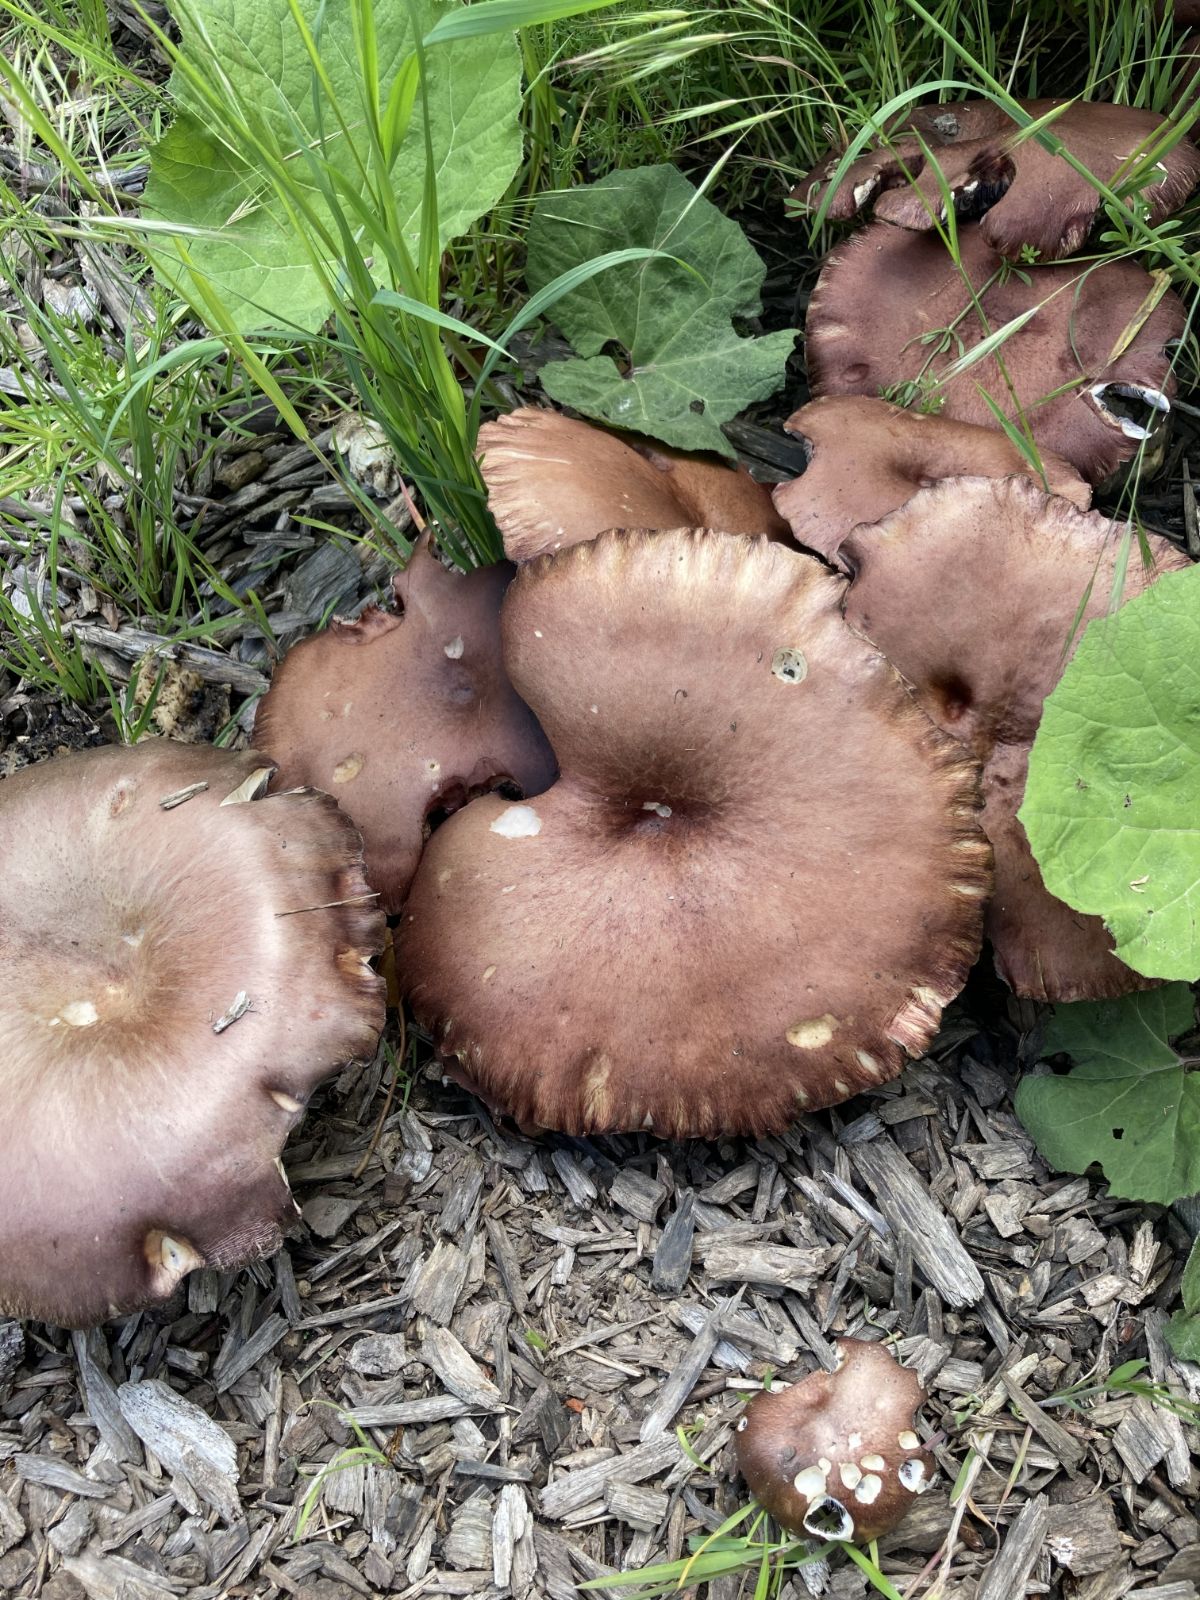
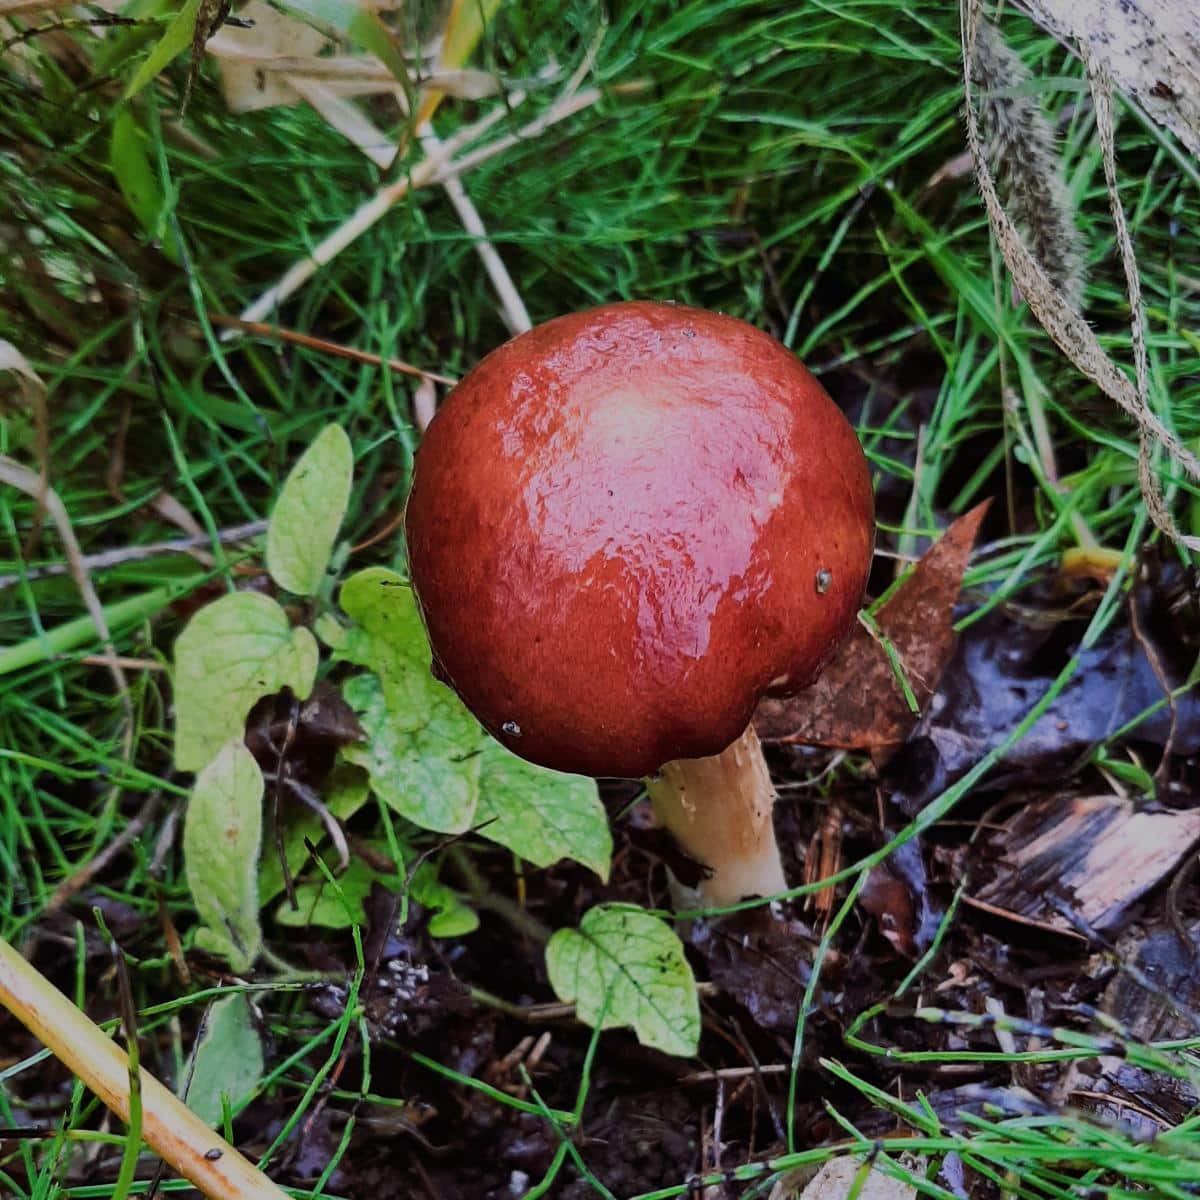
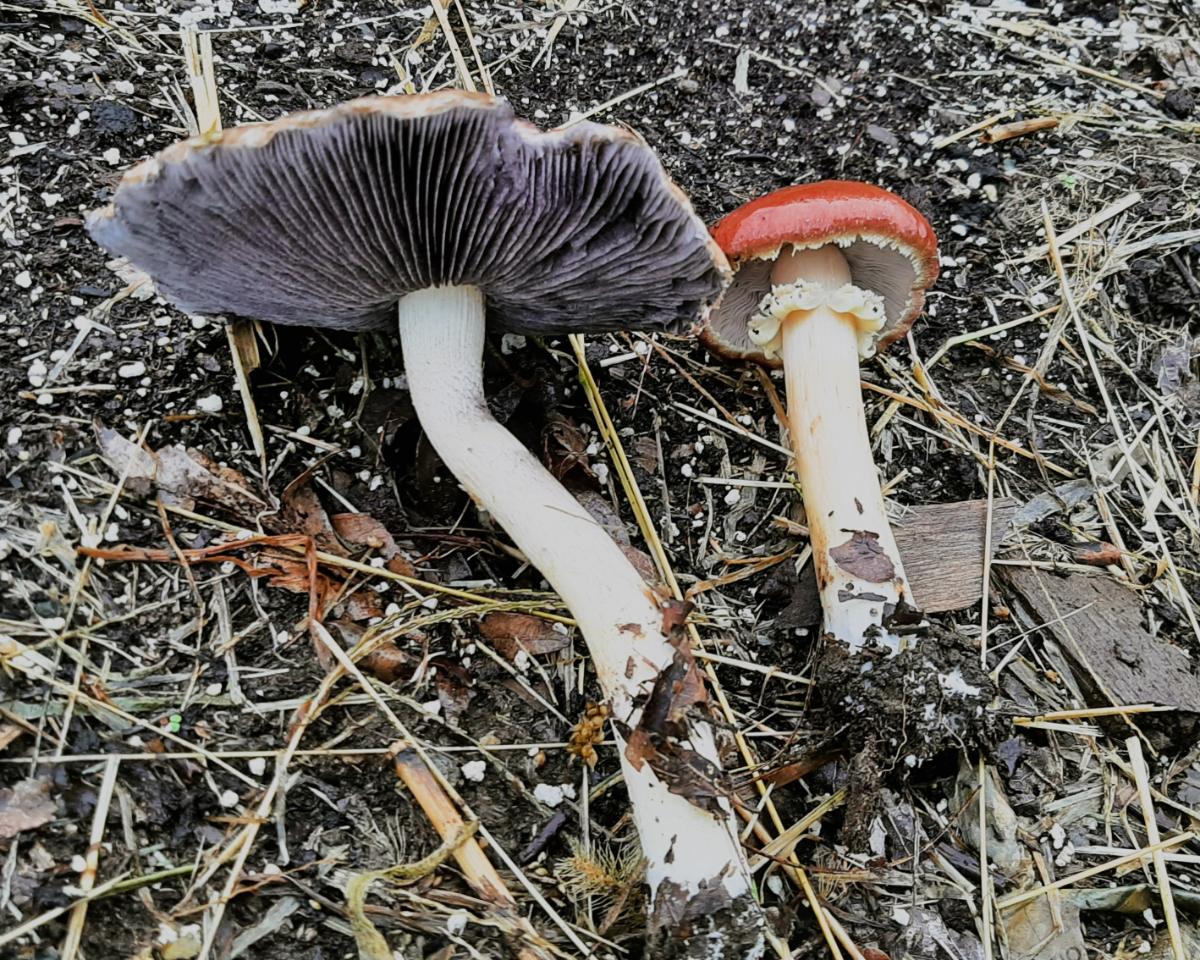
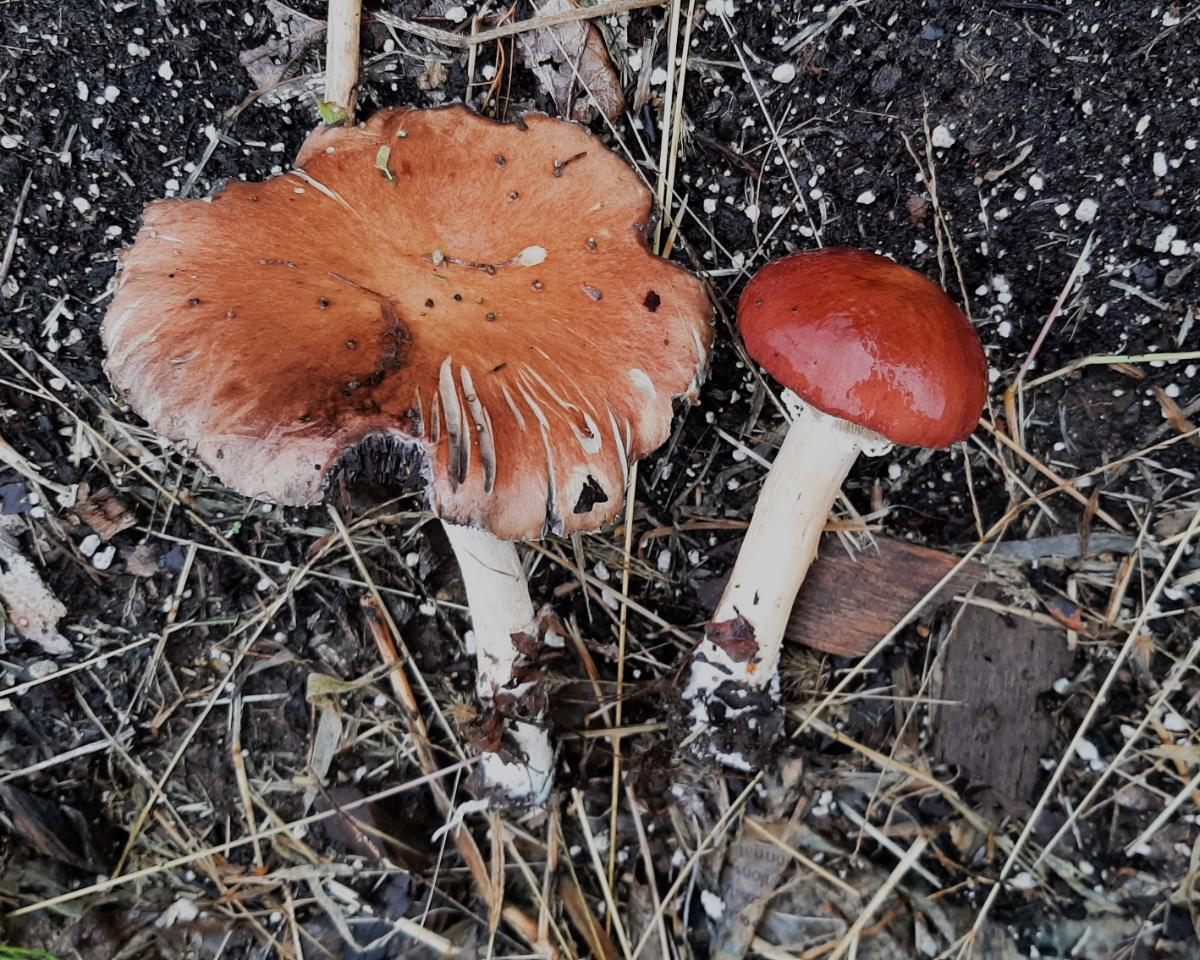
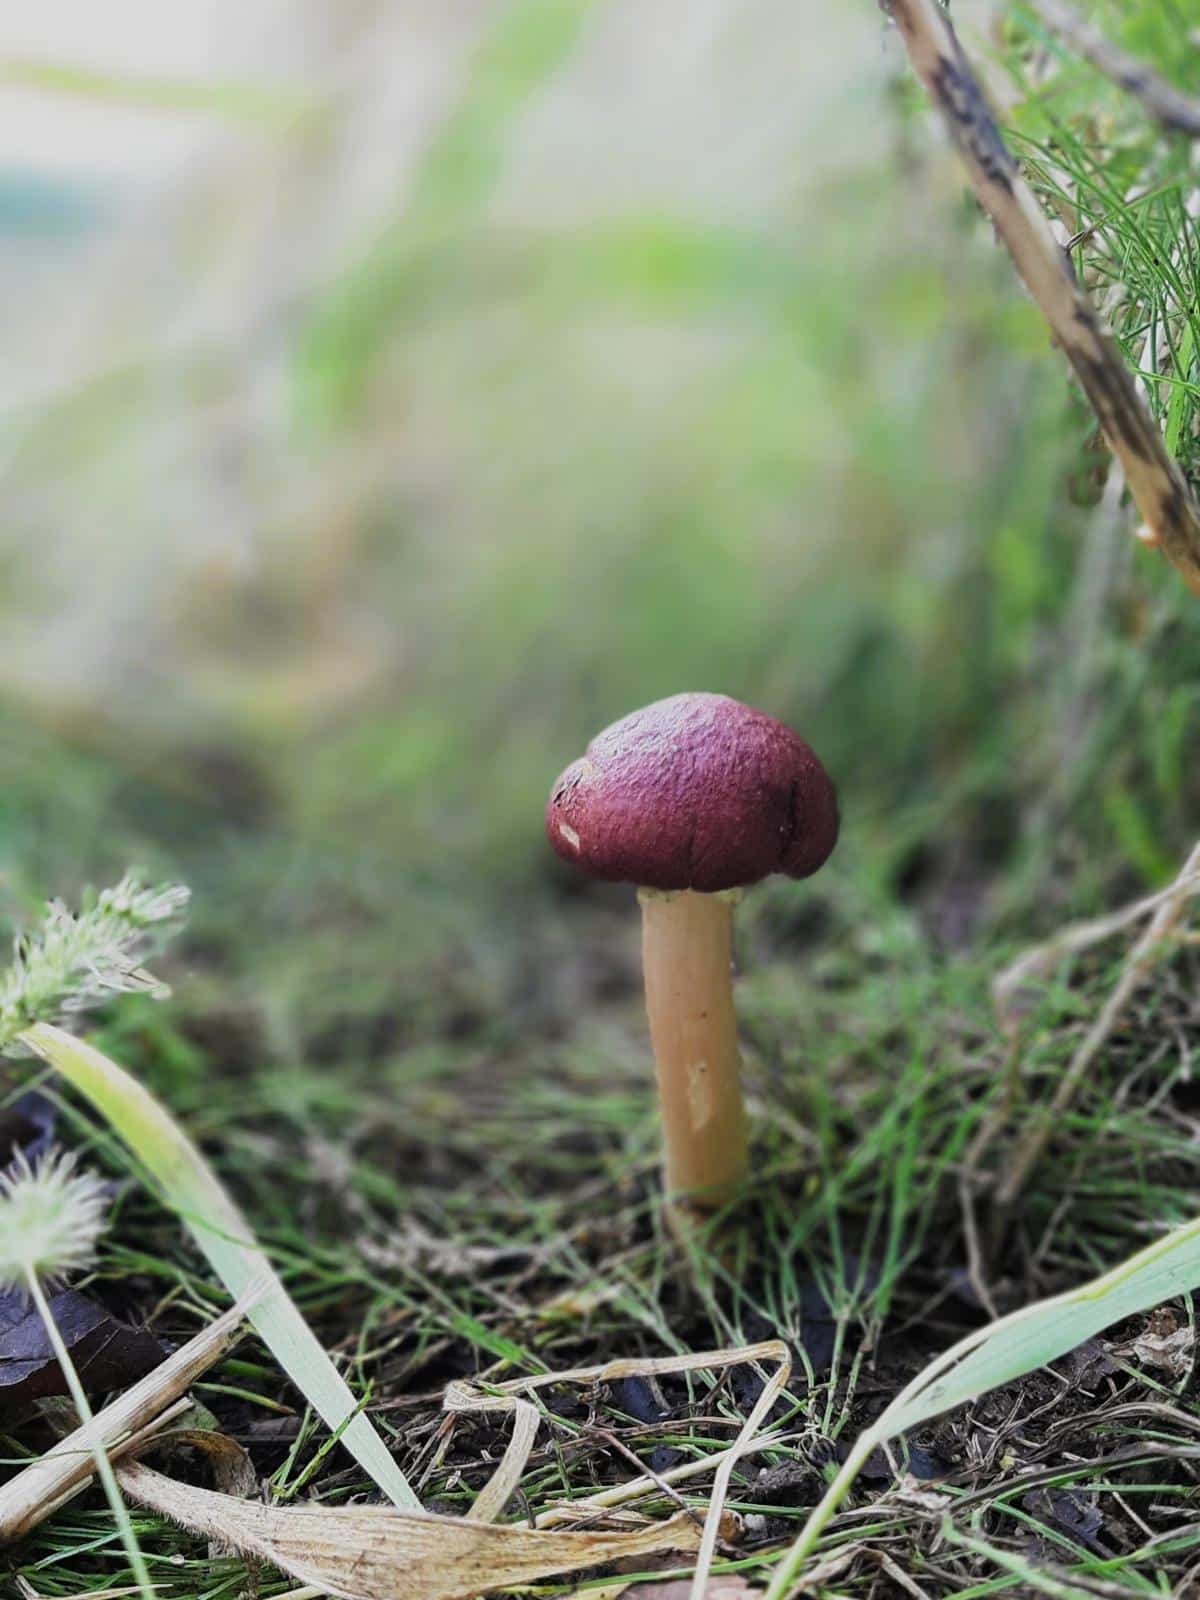
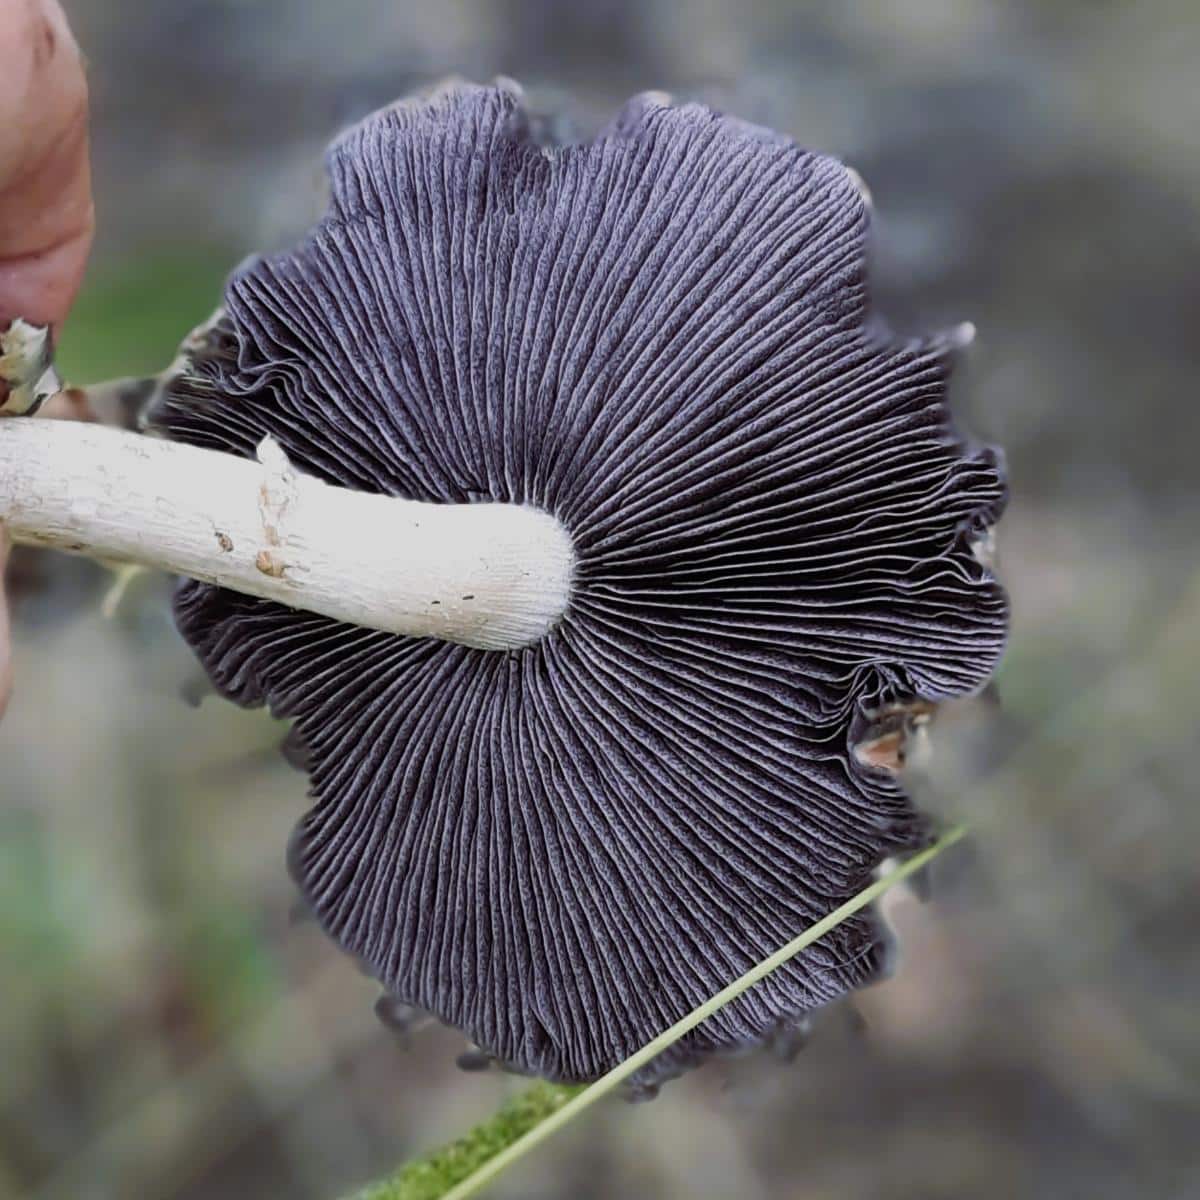
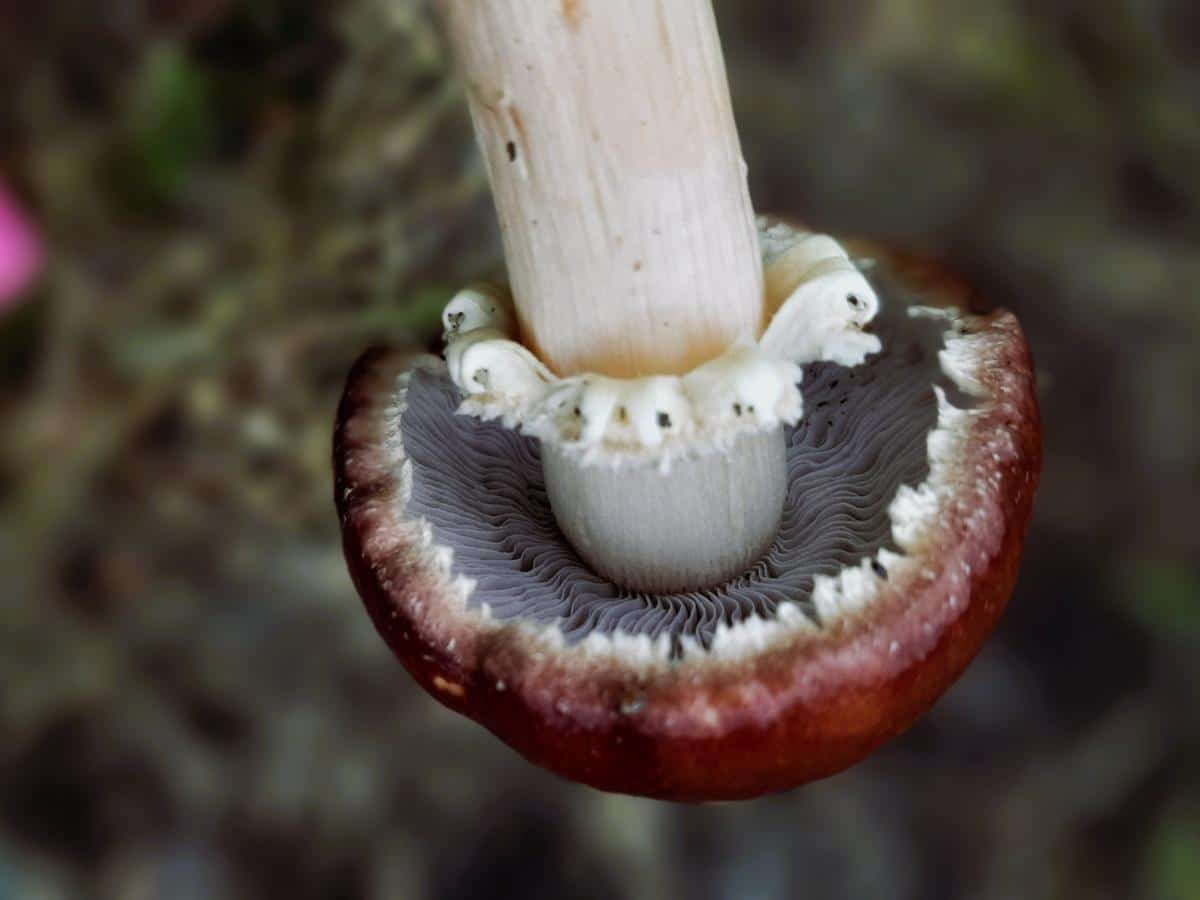
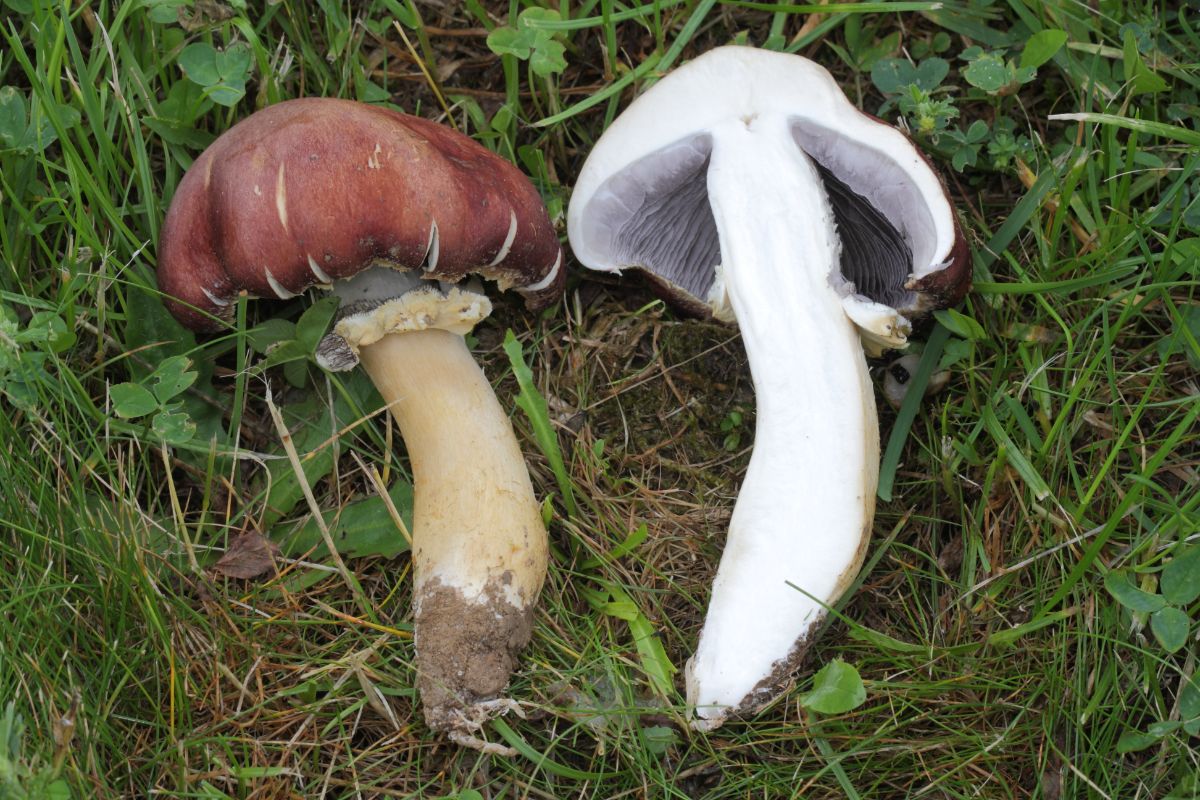
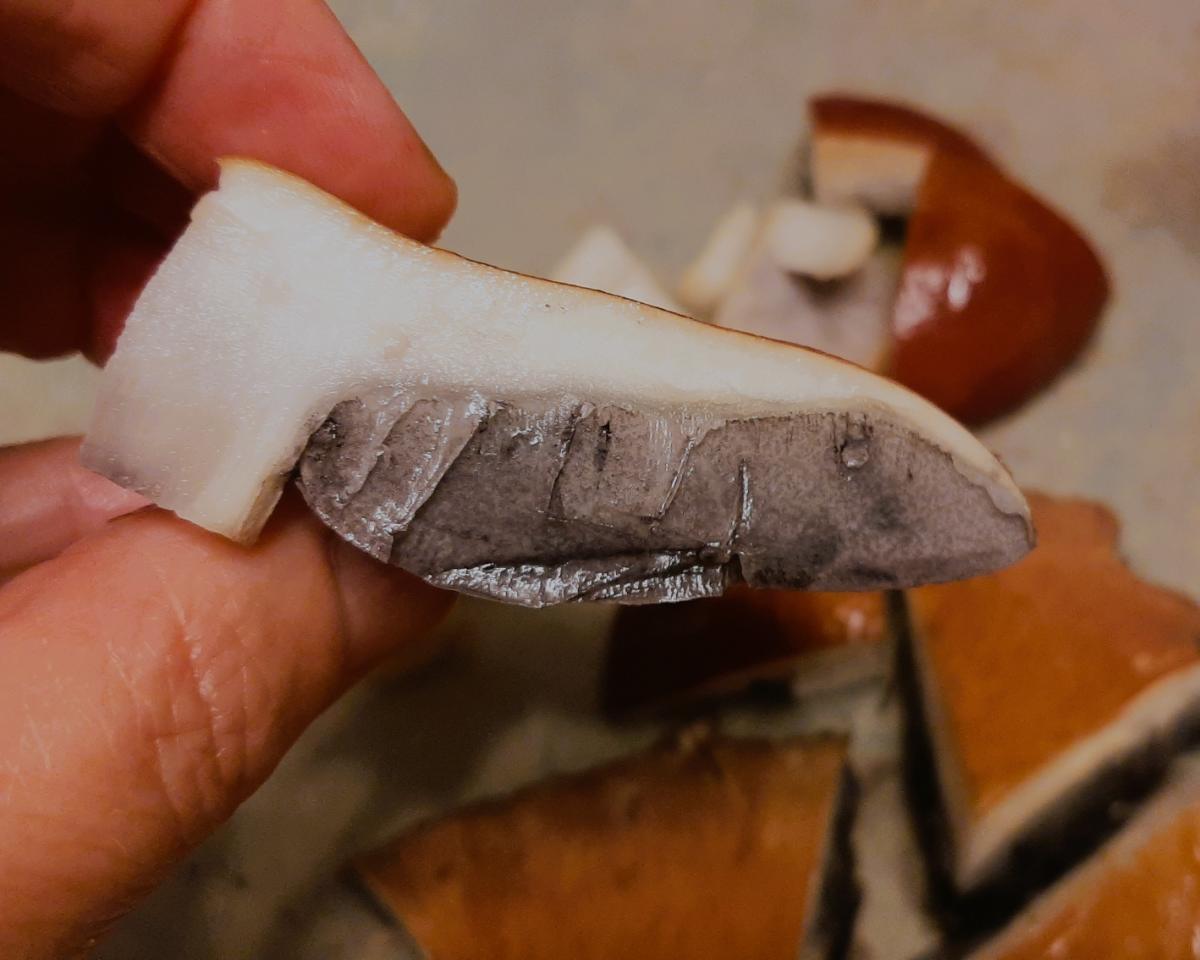
Wine caps are medium-sized mushrooms that typically have a reddish-brown to wine-colored cap, hence their name. With age or excessive sun, the caps often fade to a pale brown. The caps can reach diameters of up to 5 inches and have a rounded shape when young and flatten out as they mature. The gills underneath the cap are initially light grayish but turn dark purple as the mushroom ages. The stem is firm, white, and usually has a ring-like structure near the top. Wine cap mushroom flesh is whitish to very light gray and does not change color when cut.
When the mushroom is just forming, it has a white veil that covers the gills. As the wine cap grows, the veil breaks to reveal the gills. The ring around the upper portion of the stem is a remnant of that veil. Wine cap spore prints are dark purple to black.
These mushrooms are similar in texture to white button mushrooms but have a more robust taste. They taste earthy and nutty, with many people saying the caps are similar in flavor to potatoes or artichokes. The stem is more like asparagus in texture, stringy and crisp. They cook up the same as button mushrooms, so you can use them in any recipe that calls for button or portobello mushrooms.
The Benefits of Growing Wine Caps
- Wine cap mushrooms are easy, beginner-friendly mushrooms, making them an excellent choice for new growers.
- In the world of mushroom cultivating, wine caps are one of the fastest growers. Outdoor beds will fruit within a year, sometimes within 3-6 months if planted in spring (this is short compared to the potential year(s) it takes for shiitake, lion’s mane, and oysters).
- Wine caps are perennial in outdoor mushroom beds. This means they’ll return every year until they run out of nutrients. Beds can be prolonged by adding more mulch or wide chips for the mycelium to spread. Wood chips can also be moved around the garden to spread the mycelium to different areas and create more patches.
- When grown in a garden, the wine cap acts as a recycler. Its mycelium network brings up nutrients from the soil to the surface; this makes it valuable in the garden as it makes more nutrients available for growing vegetables.
- These mushrooms can be used in various culinary dishes, from stir-fries to soups to roasting or sauteing.
- Growing wine cap mushrooms at home reduces your reliance on commercially produced mushrooms, contributing to a more sustainable food system.
- It’s fun! Growing your own mushrooms is a fantastic and easy hobby with this species.
Wine Cap Mushroom Lifecycle
Wine caps are saprobic mushrooms, meaning they decompose organic matter. They are often found growing on wood chips and woody debris in urban and suburban areas, as well as forests and floodplains. Wine cap mushrooms go through a series of stages, from spore germination and culminating in the production of mature mushrooms. A successful harvest depends on understanding how they grow.
- Spore Germination: Wine cap cultivation begins with the germination of spores. Spores are tiny reproductive cells released by mature mushrooms. When conditions are favorable, spores land on a suitable substrate and germinate, forming mycelium.
- Mycelium Growth: Mycelium refers to the network of thread-like structures that form when spores germinate. As mycelium grows, it absorbs nutrients from the substrate, creating a solid foundation for mushroom formation.
- Pin Formation: Pins, also known as primordia, are tiny mushroom buds that emerge from the mycelium. These small protrusions are the first visible signs of mushroom development.
- Fruit Body Development: As pins continue to grow, they develop into mature mushrooms. The caps expand, the gills darken, and the stem elongates. Eventually, the mushrooms reach their full size and are ready for harvest.
Wine Cap Cultivation: Indoor vs. Outdoor
Before you start growing wine cap mushrooms, you must decide whether to cultivate them indoors or outdoors. Both methods have their advantages and considerations:
Indoor Cultivation: Growing wine caps indoors provides more control over environmental factors such as temperature, humidity, and light. It is ideal for those with limited outdoor space or those who live in climates with extreme weather conditions.
Outdoor Cultivation: Wine caps are naturally outdoor mushrooms and thrive in garden beds or outdoor mushroom patches. Outdoor cultivation allows you to take advantage of natural light and rainfall, creating a more sustainable growing environment. If you live in a temperate climate, you can inoculate your wine caps as soon as the average daytime temperature is above freezing and as late as 4 weeks before the first frost.
Choosing A Substrate
Wine cap mushrooms are known for their ability to grow on a wide range of substrates. Here are some common options to consider:
Wood Chips: Wine caps are decomposers of wood, specifically hardwood trees, making wood chips an excellent substrate choice. Oak, maple, poplar, or beech chips are the most commonly used. Make sure any bark or wood chips you use haven’t been sprayed or treated with chemicals!
Straw: Straw provides a nutritious and airy substrate for wine caps. It is commonly mixed with other materials like wood chips or sawdust to create a balanced growing medium. Make sure you’re using straw and not hay! Hay still has weed seeds in it and may mess up your inoculation.
Sawdust: Wine caps can also be cultivated on sawdust-based substrates. Sawdust can be obtained from hardwood trees or a mixture of hardwood and softwood. You need to be careful if using this substrate, though. It should not be the only material in the mushroom bed. This is because it is dense and forms mats when wet. These mats make it very difficult for the mycelium to grow and spread. When combined with wood chips or straw, it’s okay through.
Compost: High-quality compost can be used as a substrate for wine cap mushrooms; it’s best to combine the compost with some type of woody material since these mushrooms like to decompose things, which is how they get their nutrients. Compost on its own likely won’t produce good results.
Substrates Not To Use: Anything that mats is not suitable for growing wine cap mushrooms. They like air spaces to spread out and breathe. Shredded paper and wet leaves aren’t good. Sawdust can be used if it is combined with something, but never on its own.
The Ideal Growing Environment For Wine Caps
To ensure successful cultivation, you need to create the optimal growing environment.
- Temperature: Wine cap mushrooms prefer a moderate temperature range of 60-80°F (15-27°C). Avoid extreme temperature fluctuations, as they can hinder mushroom growth.
- Humidity: Wine caps thrive in high-humidity environments, ideally around 70-80%. Regular misting or using a humidifier can help maintain the required humidity levels (for indoor growing – outdoors, the mushrooms will adapt and fruit when the temperatures are ideal.)
- Light: Wine cap mushrooms don’t like direct sunlight but benefit from indirect or filtered natural light. Indoor cultivators may use fluorescent or LED lights to simulate natural daylight. Outdoor growers should choose a partially shaded spot. Growing them under bushy plants or leafy trees is a good option. If the spot is on the sunnier side, make a deeper bed to prevent drying out.
- Airflow: Adequate airflow is essential for preventing the buildup of carbon dioxide and maintaining optimal oxygen levels. Good ventilation helps prevent the growth of mold or other contaminants.
Buying Wine Cap Spawn
Purchase wine cap spawn from reputable suppliers to ensure its quality and viability. Choose between sawdust spawn or plug spawn based on your cultivation preferences. Here are some of our favorite companies:
Growing Wine Cap Mushrooms In Outdoor Beds, Step By Step
You can start your wine cap mushroom bed almost anytime. For spring plantings, wait until after the last frost and when daytime temperatures are above freezing. Fall planting should be done at least 3 weeks before the first expected frost.
For this type of planting, you can use sawdust or peg spawn. Either works fine. There isn’t a whole lot of difference between the two. Plug spawn stores longer and holds moisture better but is usually more expensive. It is also usually slower to spread and, therefore, fruit. Sawdust spawn works quicker but also dries out faster and has a shorter overall life span (before being used).
Bed size depends on how much spawn you’ve purchased. The supplier should provide this information. Generally speaking, a 5.5 lb bag of spawn will inoculate 25 sq. ft.
Before starting, clear the location of any large sticks, wood, leaves, and debris. The mushroom bed should touch the soil, so clear until you see dirt or grass.
Choosing and Preparing the Substrate
Use a fresh substrate. Any wood chips or straw that have been sitting around for a long time might already be colonized by a fungus or have bacteria or mold growing on it that will outcompete the wine cap spores.
Wood Chip Only Bed
A wood chip bed can grow mushrooms for several years. It is best to use soft hardwood chips from maple, cottonwood, magnolia, or box elder trees. Hardwood chips need to cure for 2-3 months before use. Don’t use softwood chips on their own. They can be mixed with hardwood chips, but the mix should be primarily hardwood.
- Lay down 3 inches of wood chips.
- Spread the spawn evenly over the wood chips. Or, if you’re using plugs, stick the plugs into the wood chips every few inches.
- Layer another 2 inches of wood chips on top.
- Water the new mushroom bed.
Straw Only Bed
Wine cap beds made with just straw will produce mushrooms faster, but they have a short lifespan. They’re also more prone to drying out, so you’ll need to check them more regularly to make sure they aren’t dry. Use clean straw. Soak the straw 2-3 days in advance to condition and hydrate it. Then, drain it before inoculating the bed.
- Lay down 6 inches of soaked straw.
- Spread the spawn evenly over the straw.
- Spread 4 inches of straw on top.
Wood Chip And Straw Bed (Recommended)
Using both straw and wood chips is the best method. In this method, the substrates are layered to create the ideal growth environment.
- Lay down 4 inches of soaked straw.
- Spread the spawn evenly over the straw. Or, if you’re using plugs, stick the plugs into the wood chips every few inches.
- Layer 2-3 inches of wood chips on top. The top layer is wood chips because they retain moisture better.
- Water the newly created bed.
Maintaining the Wine Cap Bed
Check the mushroom bed regularly in the beginning. Once a week is usually sufficient. The main reason for checking is to ensure the bed isn’t drying out. If you’ve gotten significant rain, then you can skip this (thanks, Mother Nature!).
Stick your finger several inches into the substrate. Ideally, it should be damp. If it is very wet, it’s probably overhydrated, which isn’t great for the mycelium but happens naturally, so it should recover just fine with warmer days. If it is dry, water it with a hose or sprinkler until it is damp. Be careful not to overdo it, as too much water is also an issue. Wine cap mycelium will “drown” with too much water.
While you’re poking around in the substrate, look for white thread-like material. This is the mushrooms’ mycelium and is a sign your inoculation worked, and mushrooms will soon be on their way.
Slugs, deer, and other animals also love wine cap mushrooms. To deter them, you can use a barrier such as a fence or a non-toxic slug deterrent. Sometimes, you have to race them to get to the fruiting mushrooms first.
Harvesting Outdoor Wine Caps
Predicting when the wine caps will show up is a little tricky. But once you learn your patch’s seasonal timing, you’ll be prepared for all the following years. It also depends on when you started the bed and where you live. If you built and inoculated the wine cap patch in the spring, there’s a good chance you’ll have mushrooms fruiting in the fall or earlier. Late fall inoculated beds usually fruit the following spring.
The wine caps may fruit anywhere from 2-11 months after they are planted. They prefer cool weather and will wait to fruit until the temperature is ideal. Usually, this happens after a good rain, too.
Harvest them when the caps are still tightly curled under and close to the stem for the best flavor and texture (think store-bought button mushroom appearance). You can harvest them when they’re larger, but the quality starts to deteriorate when the caps get large. Use a clean knife or scissors to cut the mushrooms at the base of the stem.
Wine cap mushrooms grow quickly. They can double in size every day, so when you see the buttons, don’t wait too long before picking. Freshly harvested wine caps can be stored in the refrigerator for up to a week. For long-term storage, they can be dried or frozen.
Extending Your Wine Cap Bed
Being decomposers, wine cap mushrooms break down the initial substrate quite quickly. Straw beds last about a year, while wood chip beds may produce for up to 3 years, though often with diminishing returns as the years progress.
- Rejuvenate the bed by adding new wood chips. Add several inches to the top of your existing bed, preferably in spring or after a harvest (so you don’t interrupt any who are about to fruit).
- Add new spawn as well as more substrate to the bed.
Indoor Wine Cap Mushroom Cultivation, Step By Step
If you’ve grown mushrooms indoors before, you’re probably accustomed to sterilizing everything before getting started. With wine cap mushrooms, though, you don’t do this. Repeat: Do not sterilize the substrate. Wine cap mushrooms need natural bacteria and microorganisms to grow.
What you’ll need:
- Container for growing
- Wine cap spawn
- Substrate of choice
- Water
- Several cups of soil (from your backyard is fine (preferred) – this is where the natural bacteria and microorganisms come from).
- Humidifier, Space Heater, Grow Lights (optional, depending on location – temperature, humidity, etc)
Bed Set-Up and Growing
- Prepare the growing container. This can be a tub, bucket, or bin – the size depends on how much spawn you have and how many mushrooms you want to grow. To reduce cleaning afterward, line the tub with a large trash bag. This isn’t necessary, but it helps. The container should be at least 10 inches deep to accommodate the substrate.
- Drill holes in the bottom of the container for water to flow out. Make sure the trash bag has holes in it, too, if you’re using one. Wine caps can “drown” from overwatering and must have adequate drainage. Remember to put a tray or something underneath the growing bin to catch any excess water.
- Choose a substrate. You can use wood chips, straw, or compost, preferably all three combined. Don’t use compost on its own. Soak the substrate for a day before using it.
- Drain the substrate; again, excess moisture isn’t good for growing.
- Mix the spawn with the prepared substrate, making sure to incorporate it very well.
- Fill the prepared container with the substrate/spawn mix, leaving two inches at the top.
- Place the container in a warm, dark location as it is colonizing. Or, cover it with a loose lid (don’t prevent airflow). Remember, wine caps like temperature ranges between 60-80°F and 70-80% humidity. A kitchen or bathroom or other humid location is great. You can also place a clear plastic bag over the entire bin to increase humidity. Put a few small holes in the bag for airflow, or keep one end slightly untucked.
- For the first week, check every day to see if the substrate needs watering. Depending on where it’s located, it may dry out quickly. Water gently so you’re not sending all the spawn to the bottom of the tub.
- For the second week, check every other day and then, after that, at least once a week. Water as needed. Make sure the temperatures and humidity are adequate as well.
- In a few weeks, you should see white thread-like mycelium colonizing the container. Be patient. It can take a while, depending on conditions.
- When you see the mycelium growing, spread 1-2 inches of soil over the top. This will help maintain moisture. Continue checking for water needs as well as temperature and humidity.
- After another three weeks, move it to a location where there is light. It doesn’t need lots of direct light, but some is necessary. Wine caps typically fruit best at temperatures around 70-75°F (21-24°C) and with high humidity.
- Continue checking weekly to see if the substrate needs watering and if the temps and humidity are good.
- In a short while, you should see pins forming at the top of the substrate. Mist the top of the forming mushrooms daily to ensure the fruiting bodies get enough moisture.
- Harvest when the caps just start opening up (the veil over the gills is broken, but before the caps flatten out entirely). You can harvest them anytime, but this is when they are prime in texture and flavor.
Maintaining The Wine Cap Patch
- Mushrooms are made primarily of water, so maintaining proper hydration is crucial. Make sure your substrate is fully hydrated before inoculation and continue watering as needed during the mycelial growth stage.
- Monitor and adjust the temperature to keep it within the optimal range for wine cap growth. Use a thermometer to track the temperature and make adjustments as necessary. Regularly mist the growing area or use a humidifier to maintain the required humidity levels. Be cautious not to oversaturate the environment, as excessive moisture can lead to mold or bacterial growth.
- Provide regular air exchange to prevent the buildup of carbon dioxide and maintain oxygen levels. This can be achieved through natural ventilation or the use of fans or air filters.
Troubleshooting Wine Cap Cultivation Issues
While wine cap mushroom cultivation is relatively straightforward, you may encounter challenges along the way.
- Bacterial growth and contamination happen when there is too much moisture, not enough humidity or heat, or inadequate air flow.
- If the mycelium growth is slow or nonexistent, it may be due to low-quality spawn, improper environmental conditions, or substrate issues. Double-check all factors and make necessary adjustments.
- Deformed or malformed mushrooms can result from inadequate humidity or poor air circulation. Assess the cultivation conditions to fix the issue.
Experimenting with Wine Cap Cultivation
Here are some more ideas to try with your wine cap grows:
- Cold Shocking: Cold shocking involves exposing wine cap mycelium to colder temperatures to initiate fruiting. This technique can be used to induce mushroom production during specific seasons.
- Wine Cap Companion Planting: Wine cap mushrooms grown with tomatoes significantly increase tomato yield, based on this study by Field and Forest.
Cooking With Wine Cap Mushrooms
Wine caps are prized for their earthy, nutty flavor and meaty texture, making them a versatile ingredient in the kitchen.
Wine Cap Recipe Ideas
Wine Cap Risotto: Use fresh wine caps to add depth and flavor to a creamy risotto dish. Sauté the mushrooms with shallots, garlic, and white wine before incorporating them into the risotto.
Grilled Wine Cap Burgers: Marinate wine caps in a savory blend of soy sauce, balsamic vinegar, and herbs, then grill them to perfection and serve as a side or vegetarian/vegan burger patty.
Wine Cap Stroganoff: Create a vegetarian twist on the classic stroganoff by substituting beef with sautéed wine caps. Serve the mushroom stroganoff over egg noodles or rice.
Wine Cap Recipes
- White Bean and Sun-Dried Tomato Stuffed Wine Caps
- King Stropharia Risotto with White Wine, Parsley & Roasted Ancho Chiles
- Wine Cap Mushrooms and Asparagus Quiche
- Wine Cap Stropharia Mushrooms with Butter, Soy Sauce and Gochujang
- Grilled Wine Cap Mushrooms with Herb Sauce
Common Questions About Wine Cap Mushrooms
Will wine cap mushrooms come back every year?
Wine Cap mushrooms are decomposers and break down the substrate quickly. Straw beds generally fruit for just one year, since straw decomposes quickly too. Wood chip beds, on the other hand, usually fruit up for to 3 years. However, production declines over time.
Do wine cap mushrooms survive winter?
Yes, as long as the original spawn is tough enough. To ensure this, buy from a supplier who has cultivated a northern wine cap and if you’re unsure, ask the seller!
Are wine cap mushrooms invasive?
Not in North America; they are native here. However, they have spread to other continents (probably with wood chips) and have become invasive in Australia.




ddg
I am new to mushroom growing and am looking to put in a Wine Cap patch. My concern is toxic look-alikes. Is this a concern or will the Wine Cap dominate? I currently have a reddish mushroom volunteer that someone thinks is Leratiomyces ceres. I think I can tell the difference due to the stem width and lack of veil but not sure if that is enough to tell the difference. Is this something to be concerned with?
Thank you for your time
Jenny
Hmm. Possibly. Is it possible to put your wine cap patch somewhere where other mushrooms aren’t currently growing. I think wine caps are pretty distinctive. I sometimes have inky caps grow near my patch but they are different enough it isn’t an issue.
SP
I’m new to mushroom growing and am looking to grow wine caps in my yard (I live in the Pacific Northwest). There is quite a bit of sun exposure in my yard , making the best shade under some trees, any risk to the trees putting the spawn there or should I construct a separate bed? Only a risk if the trees are already unhealthy? Thanks for any advice to this newbie.
Jenny
I think it would be fine. Wine caps are decomposers, they do not cause rot, just thrive on it. So, yeah, if the tree or roots are already in trouble it might affect them but that’s unlikely. The wine caps won’t attack the tree. I did my last mushroom bed under a huge poplar tree — about 4 feet away from the base of the tree. It still got some sun but was shaded throughout most the day. Was perfect!