Making mushroom spawn with cardboard is an awesome method, yet in my opinion very underrated. I grew my own mushrooms for years before learning about it. Now I think using cardboard is one of the best ways to grow mushrooms!
Spawn is simply any material that has been inoculated with mycelium, the vegetative growth of a fungus. Mycelium eventually produces mushrooms under the right conditions. Thus having, producing, and nurturing your own spawn becomes very important.
Why is cardboard such a great material for making mushroom spawn?
- It’s easy and cheap to find.
- It retains moisture well.
- Cardboard is a wood-based product, so it’s an easy and familiar substance for many types of mycelium to colonize.
 The corrugations allow for air exchange. Poor air exchange may prevent the mycelium from colonizing, a concern with finer substances such as sawdust.
- You don’t have to be overly worried about sterility. Sure your work area and products should be clean, but you don’t have to be too concerned about sterile techniques.
- It allows you to make A LOT of mushroom spawn with very little work!
I’m not kidding about that last part. It’s one of the best ways to make a boatload of spawn with minimal effort.
Intrigued? Read on to learn how easy making mushroom spawn with cardboard really is.
How to Make Cardboard Spawn
There are a few different ways to make cardboard spawn. The process basically involves soaking the cardboard, layering it with mycelium or a piece of a mushroom, and allowing it to be colonized.
First you’ll need to get some cardboard. Gas stations, grocery stores, and liquor stores are good places to ask. Often they’ll be glad to let you take some off their hands. Don’t be shy, grab as much as you can carry!
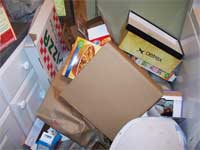
A word of caution: Not all pieces of cardboard are created equal. Sometimes they have toxic dyes or glue. Cardboard from the United States, Europe, and Canada is probably okay. Beware of things shipped from countries with few environmental regulations.
We’ll look at making cardboard spawn from sawdust and from mushroom stem butts.
Sawdust and Other Types of Spawn
You can use sawdust or some other type of mushroom spawn to inoculate cardboard. The advantage of doing this is that you put yourself in a position to create lots more spawn easily and cheaply by using cardboard than some other material.
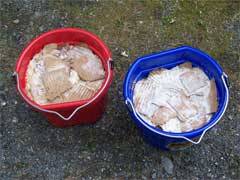
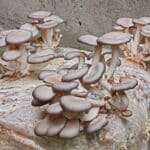
I purchased an oyster mushroom grow kit from Amazon.com. As you can see, it worked very well for me.
You’ll need:
- A few 5 gallon buckets or some other plastic containers (Remember that lots of plastic containers contain toxic BPA! If possible, use a BPA-free container. I wrote this article back before Bisphenol A came into the public consciousness, but it is something to think about now. Don’t use anything you wouldn’t want to eat out of or store food in).
- Mushroom spawn (I used the spawn from a grow kit, but grain and wood chips will also work)
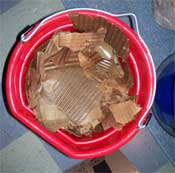
Begin by tearing your cardboard into smaller pieces. There’s no rules for size, just make sure they’re small enough to fit in your bucket.
Soak all the cardboard pieces in a tub of warm water. You can use another bucket, wheelbarrow, or some other clean container. Allow it to soak for one hour. (Note: if you forget about it like I did and leave it in there for 5 hours you’ll still be okay!)
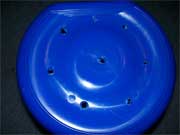
While the cardboard is soaking, make some holes in the bottom of your buckets with a drill or scissors. This will be for drainage, as standing water can encourage mold growth.
Drain the extra water from the cardboard. Now make alternating layers with it and your spawn. Lay down a layer of cardboard on the bottom of the bucket, add a layer of spawn on top of that, and repeat. Do this for up to two feet.
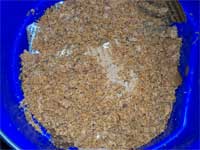
When you’re finished, gently compress the layers with your fist. We want to make sure that everything’s in contact with each other, while still retaining air spaces. Cover the top of the bucket with a plastic bag to keep the humidity level high.
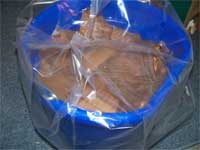
That’s it! Make sure to watch the cardboard so it does not get dry, and water it when it does.
Also know that colonizing mycelium needs oxygen, so take off the bag and fan the bucket at least once a day. You want carbon dioxide wastes replaced with fresh oxygen.
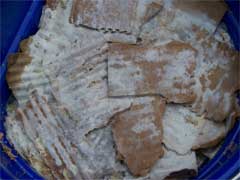
Moisture level, mushroom spawn quality, and temperature will all effect how fast your cardboard is colonized. It usually takes a few weeks to 2 months. Below is your end result.
Mushroom Spawn Stem Butts
You can also make mushroom spawn from cardboard by using stem butts. Stem butts are the bottom of the mushroom stem, the area where the stem meets the mycelium.
Mushroom stem butts often have rhizomorphs or pieces of mycelium attached to them. Rhizomorphs are root like structures used to transfer nutrients. Know that not all mushrooms have rhizomorphs, and not all mushrooms will regrow from stem butts.
Some mushrooms are famous for regrowing from stem butts:
- Oyster Mushrooms
- Morels
- Woodlovers
- Pioppinno
- Garden Giants
- Turkey Tails
So your spawn run may depend on the mushroom used, but I encourage you to experiment. If you have the stem butt of a mushroom try this method and see if it colonizes the cardboard.
To perform this experiment you’ll need:
- Some mushrooms with the stem butts intact. To get these, you’ll need to be very delicate when pulling them out of the ground by the base.
- Cardboard
- A plastic bucket or container
Make some holes in the bottom of whatever container you’re going to be using for drainage.
Oh so gently cut off the bottom inch of the mushroom stem. You want to keep the rhizomorphs and any mycelium intact so be kind!
Tear the cardboard into pieces and soak them in a clean container of warm water for an hour, keeping them submerged. The size of the pieces doesn’t matter; make them large enough to fit the container you’ll be using.
Drain the cardboard, and rip all of the top layers off to expose the middle corrugated layer.
Put the stem butts on top of the corrugations, spacing them a few inches apart.
Cover them again with the top layer that you previously ripped off. If you managed to shred it too badly you can just use another layer of corrugation.
Stack the cardboard layers in your plastic container and water whenever it feels too dry. Also make sure there is adequate air exchange.
You’ll start to see growth in this cardboard spawn after a few weeks, but it may take months before it’s looking really colonized.
Using Your Cardboard Spawn to Grow Mushrooms
After some time has gone by, you’ll have many pieces of cardboard covered with beautiful mycelium. Now what?
Now you can use these pieces by themselves to grow mushrooms or introduce them into a substrate!
Here are just a few things you can do:
- If you leave your cardboard spawn alone, it’ll often produce mushrooms on its own. You may have to adjust the temperature, light cycle, and water to suit the mushroom that you’re trying to grow. Growing mushrooms on cardboard is the easiest way to use this spawn.
- Use it to inoculate outdoor beds of wood chips, compost, or straw bales.
- Introduce the cardboard pieces into bags of pasteurized straw. This is a good way to grow mushrooms indoors.
- Use it to inoculate some other type of substrate such as paper or coffee grounds.
- Make more cardboard spawn! Sandwich the sheets between new, freshly moistened pieces of cardboard and begin the cycle again.
Note that there is a lifespan to your cardboard pieces. They won’t last forever, and sooner or later the mycelium will use up all their nutrients. Always be looking to use it to make something else and don’t let it sit colonized for too long.
Also don’t overlook the power in using these methods to create more mushroom spawn. Once a batch of cardboard is colonized, you can use part of it to grow mushrooms and part of it to create more cardboard spawn.
By doing this you’ll have a near endless supply of cheap, quick, and easily replenishable spawn.
And if that doesn’t make you want to make mushroom spawn with cardboard, I don’t know what will!


Jill Humphrys says
I love this article! It is the one that pushed me to grow oysters in a bucket. Its been a couple of years since ive grown any and im itching to do it again. I have a couple of questions though…..could i allow a bucket to fruit 1 time, then use it to make more buckets? Also, instead of buckets, how about using sterilized plastic chicken feed or dog food bags? Pack them the same way youd pack clear grow bags, but these wont be clear. What do you think of that? I look forward to your reply!
Jill
Jenny says
Thank you! You could try reusing the substrate again — oysters are known to flush several times from one inoculation. However, I wouldn’t promise it. The mycelia gets “used up” over time and at some point won’t be as fruitful. Worth a try, though! And I’d love to hear how it goes if you do it. Absolutely yes to feed bags — I bet that’d work great and what an excellent way to reuse them. Just make sure to put holes in the bottom or make sure they have some way to drain. And don’t forget to let them breathe for a little bit every day or so.