The process of growing morel mushrooms has baffled amateur and professional mycologists for years. It is still a relatively new process, still being studied and perfected. There is no guarantee with growing morels — so much depends on climate, conditions, location, and the quality and type of morel spawn.
Now that we know more about the mysterious morel, growing your own is certainly possible. Be aware that these are difficult mushrooms to cultivate, and it may take years before you see results. Also, a lot depends on the morel species — some are easier to cultivate than others. To learn about the different species, check out our guide to morel species.
You may not see any results at all – morel cultivation is not a sure thing. If a company guarantees results, especially within a given time frame, they are not reputable! Steer clear of those sellers and understand that there is an extremely high probability of failure. Or, at least a good 3-10 years before you see any results.
Reading through the other morel pages on this site before you start will help you better understand their life cycle.
Below are a few different ways to grow morels, ranging from easier techniques to more difficult. I’ve included the grow kit and mushroom spawn approach, the spore slurry process, and a few other methods. With a little experimentation, you can make one of these work for you!
Click here to share a morel growing story with visitors to this page!
Jump to:
The Grow Kit and Spawn Method
One of the most popular ways of growing morel mushrooms is with purchased spawn.
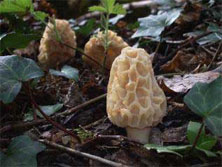
This mycelium-infused material is then used to inoculate larger batches of substrate to create a mushroom bed.
The easiest way to get spawn is by purchasing a morel mushroom kit, which you can do online. Your kit will arrive with some type of spawn or spores, and instructions on how to plant them.
Follow the instructions that come with your kit. Regardless of the company you purchase from, most will tell you to do some variation of these similar steps:
Prepare your morel bed:
- The site should be made between the summer and fall in a climate where there is an actual change of seasons. Morel mushroom kits don’t do well in tropical environments with no real winter or spring.
- Choose a shady spot and measure the dimensions. Most kits seem to be enough for a 4-foot by 4-foot square.
- Prepare the soil. You want a sandy soil mix with adequate drainage, not too much clay or rock. A sandy soil with some gypsum and peat moss mixed in seems to work well.
- Add some ashes from burned wood to your soil. Morels are known to spring up after forest fires, and ashes add nutrients and mimic a post-forest fire habitat.
Plant your spawn:
- Mix your morel spawn/spores into the prepared bed according to the instructions. This isn’t complicated, and usually just involves spreading it through the top layer.
- Mix some hardwood chips on top of the spawn bed. Morels grow near elm, ash, old apple, and tulip trees so use chips from one of these trees (preferably elm or ash).
Wait:
- The worst part! Although the mycelium is a fast colonizer, it may take a few years before it produces any actual mushrooms. Growing morel mushrooms is not a hobby for the impatient.
That’s right, a few years. Don’t get discouraged if nothing happens the following spring. Keep the area moist and nutritious according to your kit instructions. With some luck and the right conditions, you may someday have morels in your backyard!
The Spore Slurry Method
If you’re an accomplished mushroom hunter and don’t want to buy a kit, you may have some success growing morel mushrooms by using the spore slurry method.
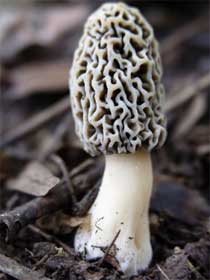
To create this solution you’ll need some wild morels. They should be mature, although not mushy or rotting. A few mushrooms per gallon of water will be sufficient.
Follow these easy steps:
- Start with some clean, non-chlorinated water in a food-safe container.
- Add a pinch of salt and about a tablespoon of molasses to the water and stir. You don’t need much of each. The salt is to inhibit bacterial growth; the molasses is to provide sugars for germinating spores.
- Add mushrooms and let the mixture sit covered for 1 to 2 days in a temperate place. Any longer than that and you risk bacterial contamination.
After you strain and remove the mushrooms you’ll have a liquid with millions of spores!
This spore liquid can be spread over a prepared bed as described above (sandy soil with peat moss, ashes, and wood chips). It can also be spread in other known morel habitats, such as at the base of dying elm trees. Feel free to experiment with your slurries.
This process is easy, but the downside is that it can be unreliable. A spore slurry is not as far along in the life cycle as mycelia in spawn, so the odds of success aren’t as good.
However this is one of the cheapest and easiest ways of growing morel mushrooms, so why not give it a try?
This method can work with other types of mushrooms too!
Other Methods for Growing Morel Mushrooms
Inoculated Trees:
Since morels often grow near certain trees, it makes sense that inoculating the roots of these trees with morel mycelia may result in mushroom production.
The easiest way to do this is by broadcasting spores using the slurry method described above near the base of a tree (elm or ash). Other ways involve nurturing a young tree by either:
- “Infecting” the roots of a young tree with mushroom spawn. You’ll need a very young elm, ash, or apple tree and some spawn from a morel mushroom kit. Plant the tree and spawn together, with the spawn strewn throughout the tree roots. Care for it as you would any young tree of the species you chose.
- Purchasing inoculated trees. You can purchase baby trees that have been inoculated with morel spores/mycelia online. These will come with instructions for care, and if you follow them carefully you may be growing morel mushrooms within a few years.
Indoor Cultivation:
Don’t think you have it in you to nurture a young tree? You can always try the last, and most difficult, method mentioned on this page: growing morel mushrooms indoors.
For years this technique was thought impossible. Many tried and failed to cultivate morels indoors.
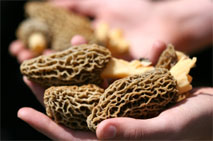
Mills went on to create a company involved in large-scale cultivation, which you can read more about in this article by Michigan State University news. Unfortunately, due to several circumstances, it never became commercially viable.
So yes, it is possible to grow them indoors, however unlikely. The process is similar to other types of mushroom cultivation:
- Growth of morel mycelia from spores or a small piece of mushroom on a nutritious agar media.
- Sterile transfer of mycelia from agar to a spawn jar, which is a sterilized jar of rye seed or some other grain. The mycelia will colonize these jars in about a month or two. You’ll be able to see lumps of sclerotia forming.
- Transfer of sclerotia from grain spawn to a special substrate of sandy soil and wood chips. These will eventually fruit into mushrooms under specially controlled environmental conditions and some good luck.
Ok, so the above directions make it sound far simpler than it actually is. Although I’ve cultivated mushrooms indoors, I’ve never tried with morels, so to go into detail would be just me plagiarizing someone else’s work.
UPDATE: Thanks to the anonymous visitor who sent me Peter Dilley’s Grow Morels instructions. I’d highly recommend visiting his page if you want more info on indoor growing.
For more information on growing morel mushrooms indoors I’d recommend reading Paul Stamets’ Growing Gourmet and Medicinal Mushrooms.
So there’s your introduction on how to grow morel mushrooms. Start out with one of the easier methods but don’t be afraid to get creative and experiment. Many advances in mycology were made by accident.
Remember that your main goal is to create a habitat conducive to your particular mushroom. Although not always easy with morels, it’s not as impossible as once thought.
Learn, experiment, be patient, and above all have fun! You’ll be glad you did when in a few years you’re picking morels straight from your backyard.



Mike Paradise
Hi, i have some old morels i keep in a jar 5 years or more old that i keep just because i love the smell!!! would these have viable spores for a slurry? Can i plant in a red pine grove? and lastly would the stringy “shavings” from cutting red oak logs lengthwise with a chainsaw work instead of wood chips? imagine 2-3 inch long linguini noodles for the size of the chips thx
Jenny
All of this is worth trying, but I highly doubt there’d be much success. Morels that old probably don’t have viable or strong spores. Fresh specimens are best to get those fresh spores. But, as much is still unknown about the cultivation of different types of morels, it could be worth the effort. It will help too if you know the type of morel, so you know what trees it associates with — > https://www.mushroom-appreciation.com/morel-species.html
R. Smith
Jenny, two questions: 1. would adding mycorrhizal fungi help or hurt growing Morels? 2. Can they grow under pecan trees? Thanks!
Jenny
I’m not sure what you mean my adding mycorrhizal fungi — do you mean mycorrhizae from morels you’ve foraged? Like in a spore slurry? Or just on it’s own? Yes, that should help. I mean, really, nothing can hurt. These techniques are hopeful at best. Morels are a finicky one. I have never heard of morels growing under pecan trees, but that isn’t to say it isn’t possible. Morchella americana, in particular, grows under a wide host of tree species and seems to be less picky about it. Good luck!