

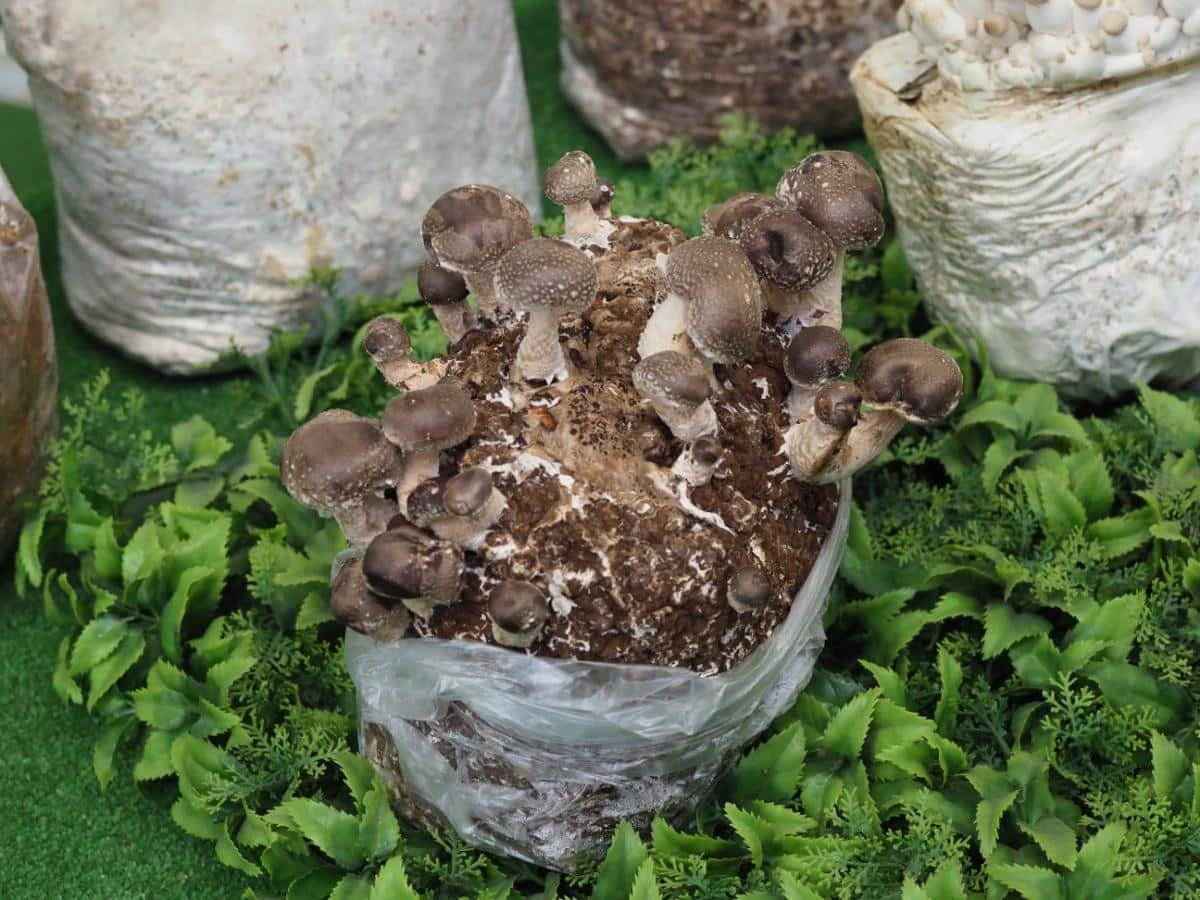
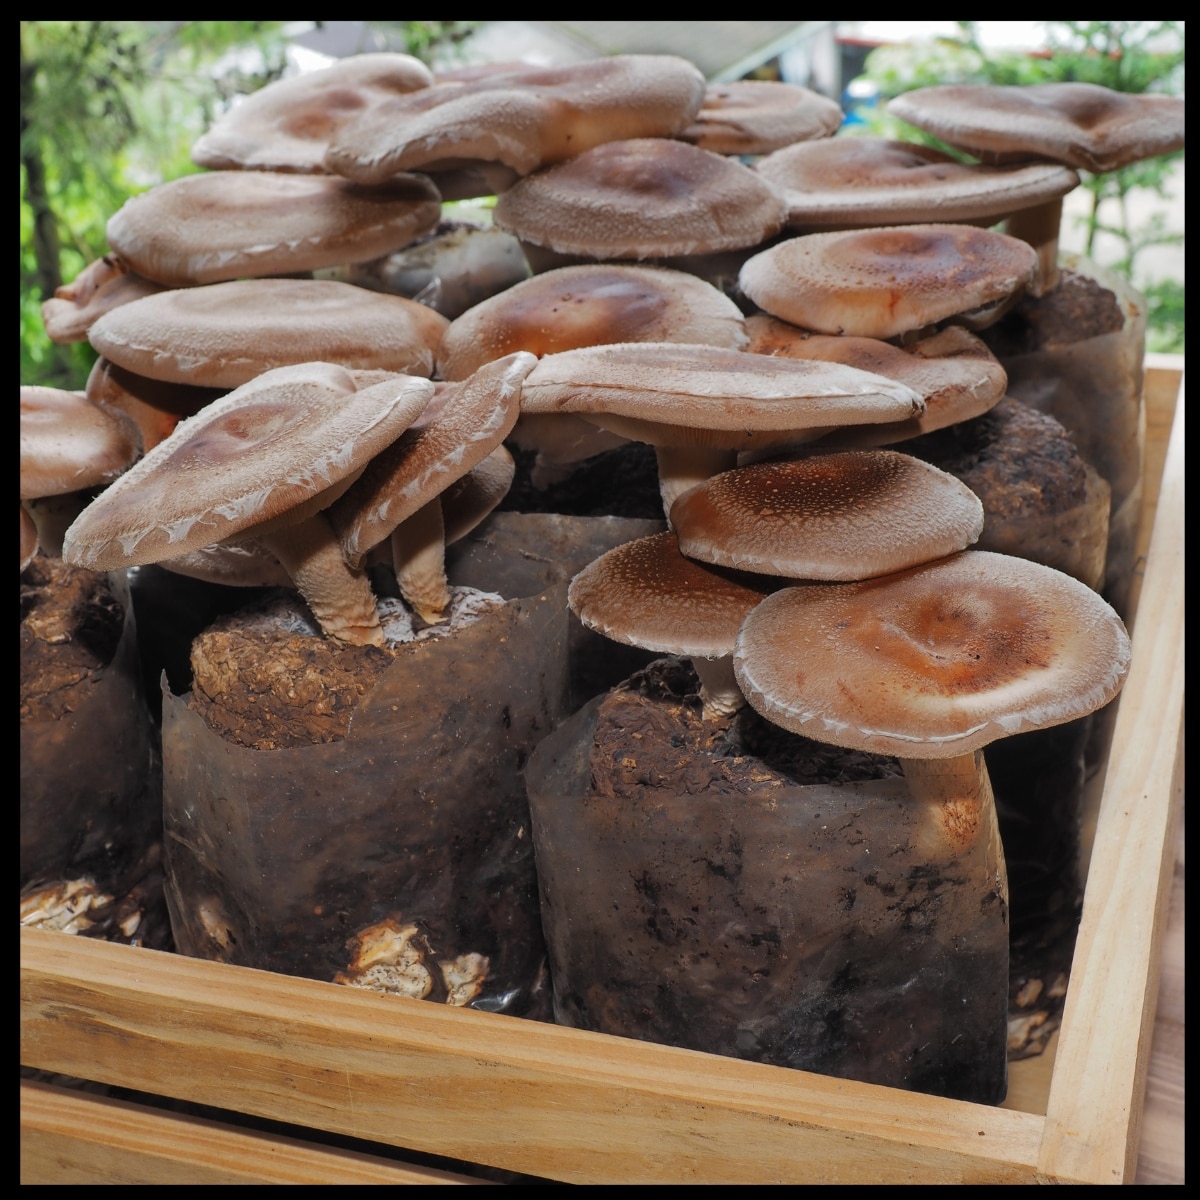
Shiitake mushroom growers worldwide, from small hobbyists to large-scale producers, prefer growing their crops in bags. This method has become the standard practice to grow shiitake mushrooms because it is easy to do and gives excellent flushes.
Growing mushrooms often seems challenging at first glance. The process to grow shiitake mushrooms becomes straightforward, though, once you understand the simple principles. The original colonization takes about 3 months, but your patience will be rewarded lots of fresh and delicious shiitake mushrooms!
This guide explains how to set up your own grow bags using purchased shiitake spawn. You can skip some of these steps and buy prepared shiitake mushroom growing kits, which are already pasteurized, inoculated, and ready to fruit.
Jump to:
- Why Grow Shiitake Mushrooms
- Shiitake Mushroom Growing Introduction
- How To Grow Shiitake Mushrooms: The Basics
- Preparing Your Growing Space
- How To Grow Shiitake Mushrooms In Sawdust Bags, Step by Step
- Caring for Shiitake Mushroom Grow Bags
- Harvesting Your Mushrooms
- Common Questions About Growing Shiitake Mushrooms In Bags
Why Grow Shiitake Mushrooms
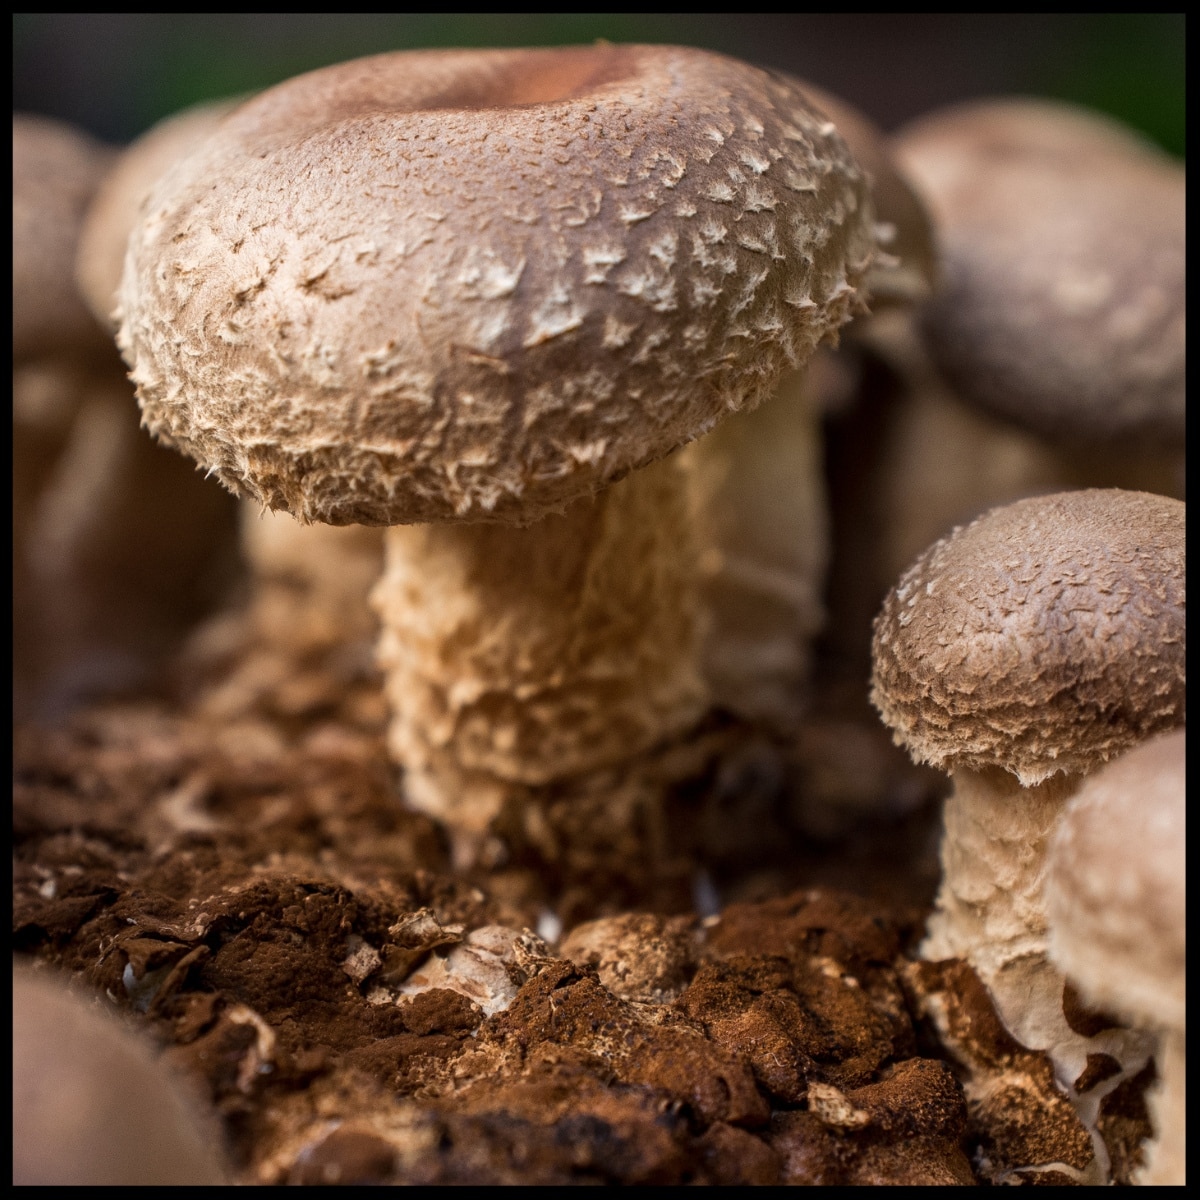
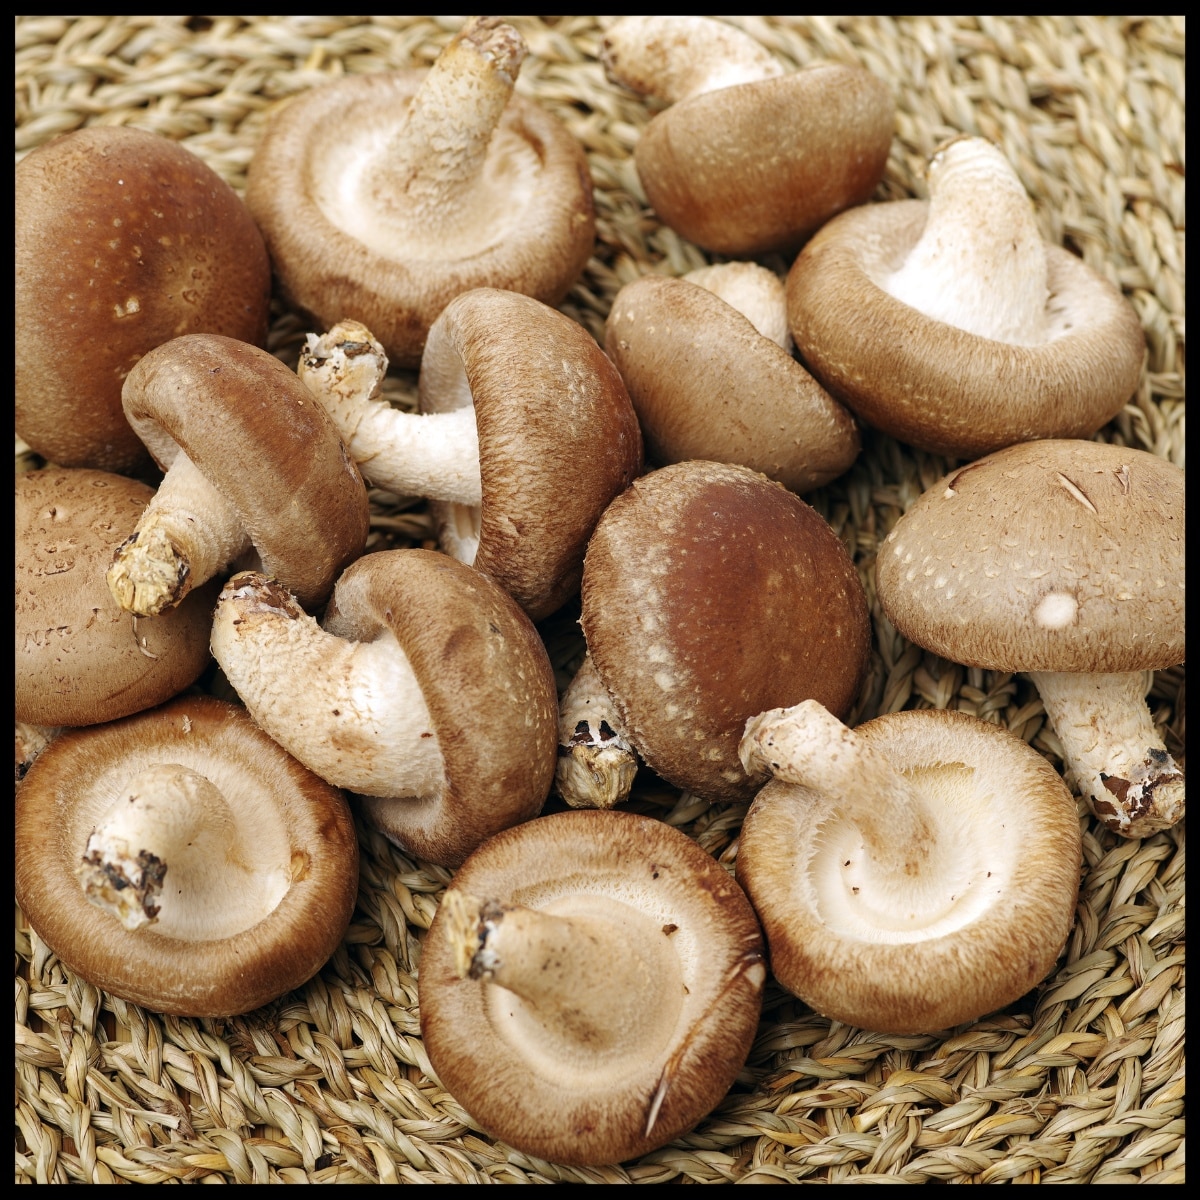
Shiitake mushrooms (Lentinula edodes) are edible fungi native to East Asia. They are widely cultivated for their culinary and medicinal properties. These mushrooms have a distinctive meaty texture and a rich, savory umami flavor. When cooked, shiitakes develop a tender, chewy consistency and a smoky, earthy taste that is delicious. These are a top culinary mushroom!
Shiitake mushrooms have numerous health benefits, too. They are low in calories but high in fiber, vitamins, and minerals, including vitamin D, B vitamins, and selenium. Shiitakes contain the compounds lentinan and eritadenine, which have been studied for their potential immune-boosting and cholesterol-lowering effects.
Fresh shiitake mushrooms are available in some supermarkets and specialty stores, especially in Asian markets. They’re also widely available dried. But they aren’t sold everywhere (yet!), and sometimes it can be difficult and expensive to get them. When you learn how to grow shiitake mushrooms at home, you guarantee the freshest, tastiest mushrooms for your cooking!
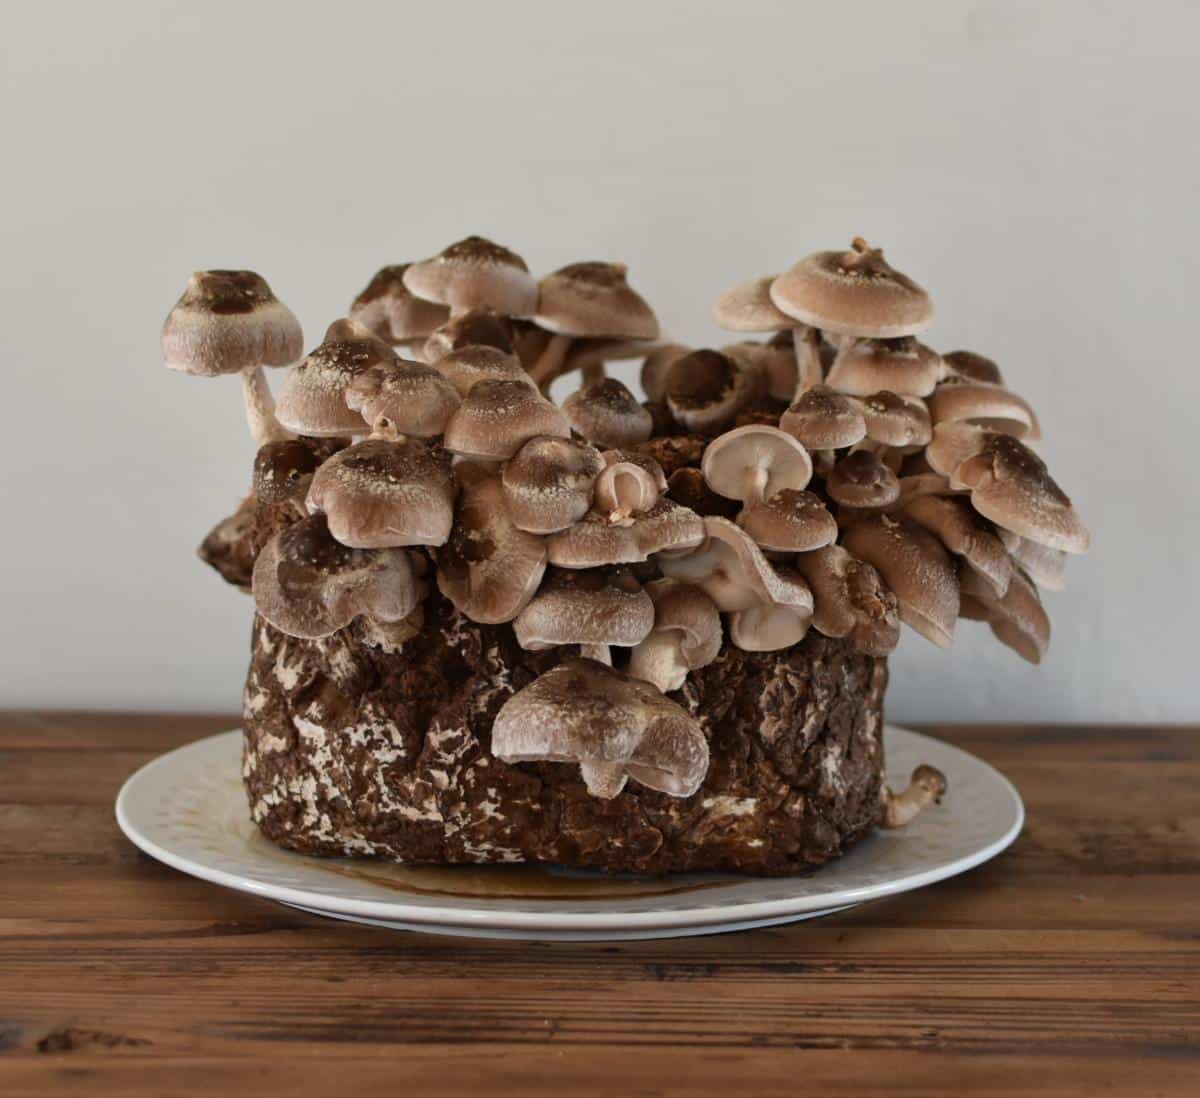
Shiitake mushrooms are commonly and traditionally grown on logs, but sawdust blocks give you faster results. You can harvest your first batch in 3 months, while logs take 6-24 months. Commercial growers like to grow shiitake mushrooms in bags because they can grow indoors all year round and predict their harvests better.

Shiitake Mushroom Growing Introduction
To grow shiitake mushrooms successfully, you need to understand their lifecycle. It starts with shiitake mushroom spores that create thin structures called hyphae. These hyphae connect to form a network known as mycelium. The mycelium spreads through the substrate, usually wood.
When conditions are right, the mycelium produces small bumps called primordia or pins. These bumps develop into the brown, gilled mushrooms we recognize. The mature mushrooms then release spores, completing the cycle. The entire process, from spore to mature mushroom, can take a few weeks to a few months, depending on the growing conditions.
Words To Know:
Spores
Spores are the parts of mushrooms that help them reproduce, like seeds in plants. In mushroom farming, people collect spores to grow new mushrooms.
Mycelium
Mycelium is the main part of a fungus. It is made up of thin white threads called hyphae. These threads grow through soil or other materials. Mycelium is crucial for growing mushrooms and acts like the “roots” of the fungus.
Substrate
In mushroom growing, the substrate is the material that mushrooms or mycelium grow on. It gives nutrients and helps the mycelium develop into mushrooms.
Spawn
In mushroom growing, “spawn” refers to a mix of a base material, like grain or sawdust, that contains mushroom mycelium. In simple terms, spawn is the base with mycelium in it. It is the starting point for growing mushrooms and helps spread the fungus to a larger area for growth.
The step-by-step process to grow shiitake mushrooms:
- Mushroom spores are collected (from the wild or traded or sold) and grown into mycelium.
- The substrate is prepared (sterilized) for inoculation (this is usually grain)
- The substrate is inoculated with mycelium to create spawn
- Mycelium grows and spreads through the substrate in concentrated amounts – this is now spawn
- A different type of substrate is prepared (sterilized) for inoculation
- Spawn is distributed to prepared second substrate (this is usually sawdust or straw grow bags)
- Mushrooms grow from bags
If you’re setting up a DIY project, you’ll start at step 4. With Grow Kits, the company you bought the spawn from has already completed the first three steps. The two inoculations are done so that a concentrated version is created first, and then it is divided into bags for growing.
You can also start to grow shiitake mushrooms by preparing your own spawn. This requires more skill and resources, but it can save you money in the long run since you won’t need to buy spawn. It also allows you to grow different varieties and species because you won’t rely on suppliers for prepared spawn.
How To Grow Shiitake Mushrooms: The Basics
There are many strains of shiitake spawn available for purchase. Many are distinguished by whether they are cold or warm weather strains. Different strains need different temperatures.
Wide-range shiitakes produce fruit between 50-75°F, usually within 6-12 months. Cold weather strains take up to two years before fruiting but reward you with beautiful and flavorful mushrooms. Warm weather strains do well in temperatures between 50-80°F. Choose the one that best suits your setup.
You’ll need these items to grow shiitake mushrooms indoors:
- A clean, controlled environment for growth
- Hardwood-based substrate (preferably oak sawdust)
- Proper ventilation system for fresh air exchange
- Temperature and humidity monitoring tools
- Sterilization equipment for substrate preparation
- Grow bags with filter patches (for airflow and to keep contaminants out) or jars or other container
- Mushroom spawn (colonized grain spawn, not sawdust spawn)
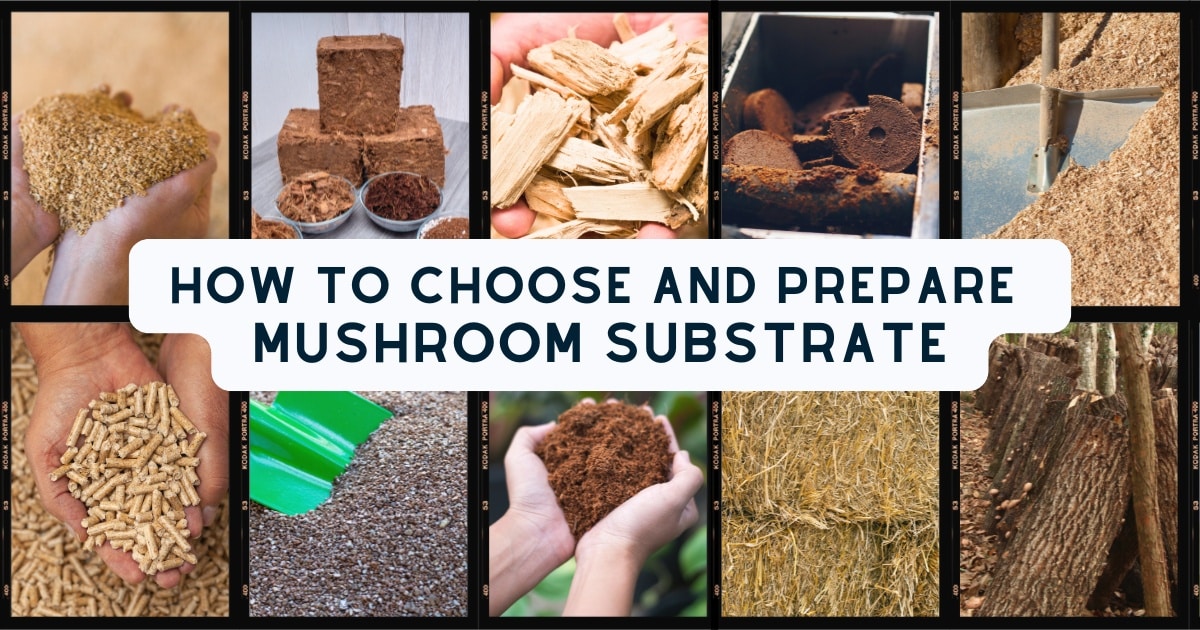
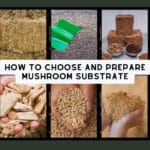
Hardwood sawdust is the main ingredient for the growing medium. Oak sawdust is recommended, especially if you can get it from nearby sawmills. Make sure the sawdust is new, tidy, and free of bark or leaves.
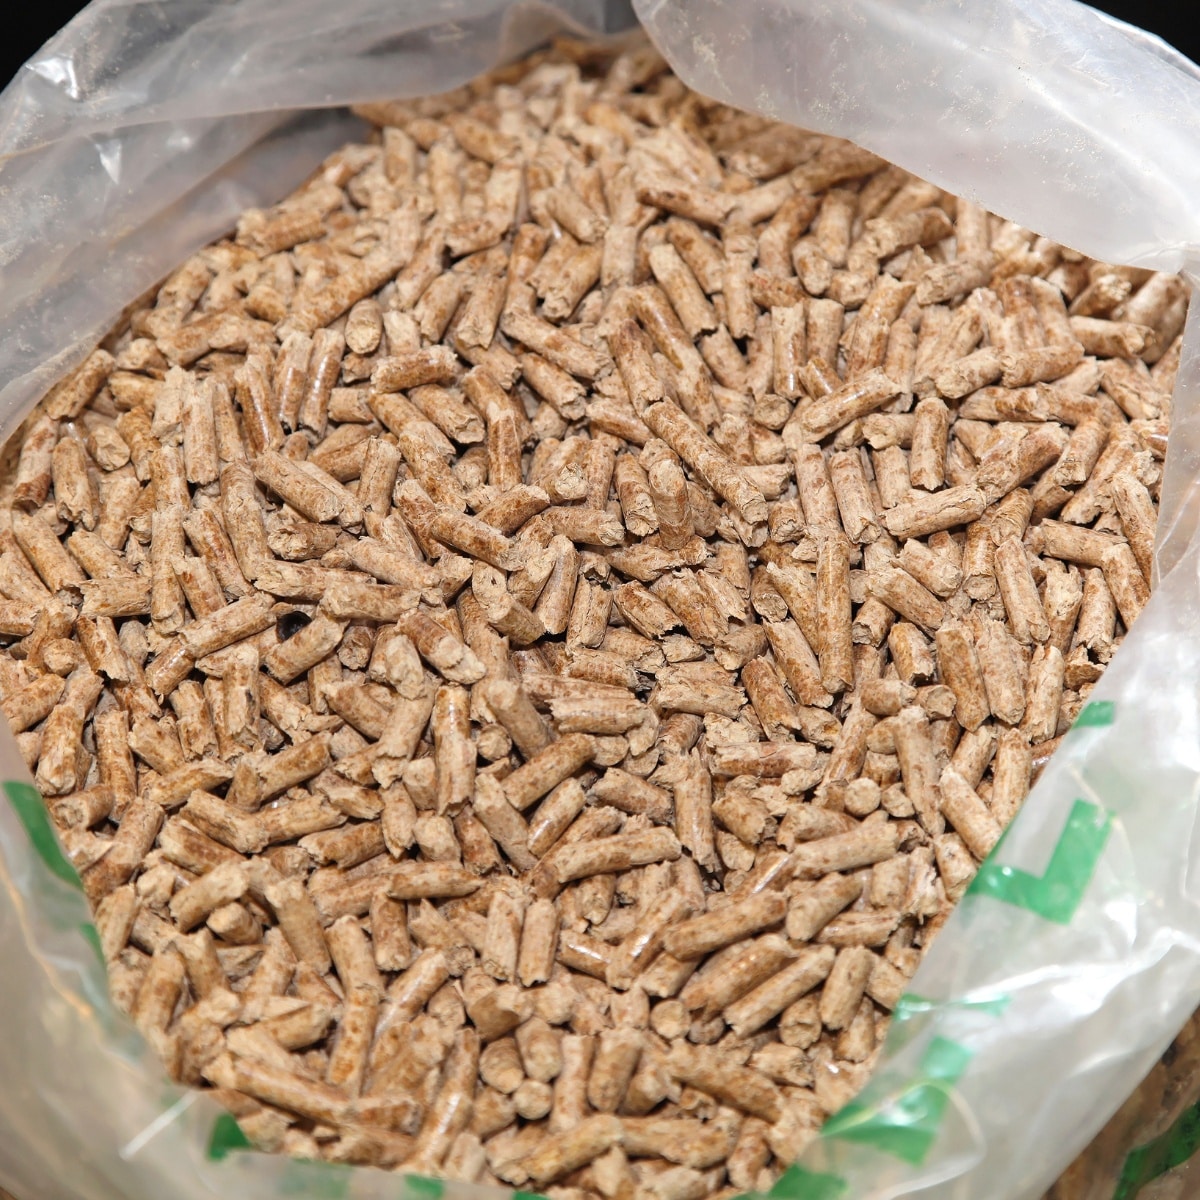
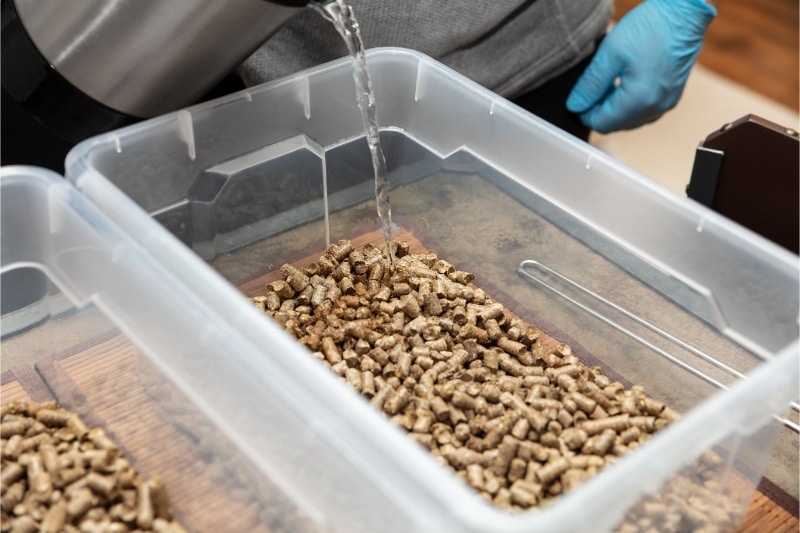
Hardwood fuel pellets are a good option, too, as they are clean and easy to use due to the heat treatment during production. An ideal mix includes 79% sawdust, 20% wheat bran, and 1% gypsum by weight when dry. Learn more about substrate recipes and modifications in our DIY Mushroom Substrate Recipe guide.
Grow bags are used to hold the shiitake substrate and protect it during growth. They come in various specifications. The thickness varies from 2.2mm to 4.0mm. Thicker bags last longer but are more expensive. The filter patches on these bags have pore sizes between 0.2mm and 5mm. This design allows air to flow while keeping contaminants out.
These specialized bags cost between $0.70 and $1.00 each. The clear plastic lets you see how the mycelium is growing and helps you spot any contamination early.
The mushroom spawn is the starter material to grow shiitake mushrooms. Do some research and only buy from trustworthy vendors. We suggest North Spore, Mushroom Mountain, and Field and Forest. A 5.5-pound bag of spawn can inoculate up to 300 pounds of hydrated substrate. Keep your spawn in the refrigerator and use it within six months to get the best results.
To grow shiitake mushrooms in bags, you need a pressure cooker to sterilize the substrate. You need specific pressure and temperature levels to kill contaminants. Follow our Guide on How To Choose And Prepare Mushroom Substrate, which includes detailed instructions on the sterilization process.
Preparing Your Growing Space
The key to successful shiitake mushroom cultivation in bags lies in creating an optimal environment. A well-prepared space will promote healthy mushroom development and reduce contamination risks.
A sterile environment is necessary to grow shiitake mushrooms and prevent unwanted bacteria and competing fungi. HEPA filtration in a dedicated clean room or workspace is ideal because it eliminates 99.99% of airborne particles, bacteria, and fungi. This filtration system creates the controlled environment you need for cultivation stages – from inoculation to substrate preparation. If you can do this, this is the absolute best option. For most of us home growers, though, a dedicated HEPA-filtered room is not possible.
Another option is a still air box (SAB). It typically consists of a large, clear plastic container with arm holes cut into one side, allowing the cultivator to work inside while minimizing air movement and potential contamination. The primary purpose of an SAB is to reduce the risk of airborne contaminants coming into contact with sterile substrates, cultures, or other sensitive materials used in mushroom growing.
Before use, clean the inside thoroughly with a disinfectant solution. Then, place all the necessary tools and materials inside the box before beginning work. While not as effective as a dedicated space, a still air box is an affordable and practical solution for mushroom growers.
Temperature control is a vital part of shiitake cultivation. Shiitake mushrooms grow best between 60 and 65°F (15.5-18°C). Warmer temperatures speed up growth but increase contamination risks. Cooler temperatures produce larger mushrooms at a slower rate.
Shiitake mushrooms need environments with 80-95% relative humidity, so humidity management needs careful attention. The setup should include:
- A high-quality humidifier
- Humidity meters for accurate monitoring
- Proper ventilation systems for air circulation
- A still-air box or other clean environment for mixing the substrate
Your growing space needs good airflow, but be careful of drafts that can dry out the mushrooms. A great way to ensure air exchange is to use a ventilation system on a timer. Set it to run for 15 minutes every hour.
Shiitakes need different spaces, temperatures, and humidity during the growth process. After you inoculate the substrate, the bags need to go into a dark, cool environment with good humidity and no light. Once they start pinning, they need to be moved to a place with indirect light.
How To Grow Shiitake Mushrooms In Sawdust Bags, Step by Step
Before you start, make sure to sterilize everything. Clean your tools with isopropyl alcohol or a similar solution to prevent harmful bacteria. Once your workspace is clean, gather all the supplies you need. Focus on inoculating and colonizing the substrate properly, and keep your environment clean.
Mix the Substrate
To make your mixture, start with hardwood sawdust and wheat bran. Use 1 pound of sawdust and 0.25 pounds of wheat bran. Add water to the mix in increments until it has the right moisture. You can check if it’s wet enough by squeezing it—if a few drops of water come out when you squeeze, it’s ready.
Fill The Bags
The mixed substrate goes into the grow bags. These bags have a filter that allows air to flow in while keeping contaminants out. Each bag should hold about 5-6 pounds of substrate. Leave some space below the filter patch so it doesn’t get blocked. The top of the bag needs to be folded so that the filter stays inside. This helps prevent moisture buildup, which can lead to contamination.
Sterilization
Sterilization is an important process that removes unwanted organisms. Place the filled bags in a pressure cooker at 15 PSI pressure to heat them to 250°F (121°C). For small batches of 6 bags, sterilization takes 2 to 2.5 hours.
Adding Spawn to Bags
Let the bags cool completely before moving them to your clean workspace or still air box to add the spawn. It’s important to limit the time your spawn and substrate bags are exposed to outside air.
Use a 12.5% spawn rate, which is about 0.625 pounds per bag. Gently shake the bag to spread the spawn evenly in the substrate. Seal the bags with an impulse sealer or wire ties.
After sealing the bag, mix the spawn evenly through the substrate. Leave some empty space in the bag to help with mixing. Roll or massage the bag to mix the spawn thoroughly. Once mixed well, tamp the substrate down to form a solid block.
Once the bag is sealed, the spawn must be evenly mixed into the substrate. Leaving space in the bag helps with this. Make sure there are no clumps, as that will slow down or inhibit the mycelium spread. Roll or massage the bag to keep mixing the spawn. After thorough mixing, press the substrate firmly on a flat surface to form a solid block.
Caring for Shiitake Mushroom Grow Bags
Once the substrate and spawn are mixed together, all you need to do is put the inoculated bags in the right environment and be patient. They don’t need a lot of care at this time, just the right conditions to hang out in while the mycelium fully colonizes the substrate.
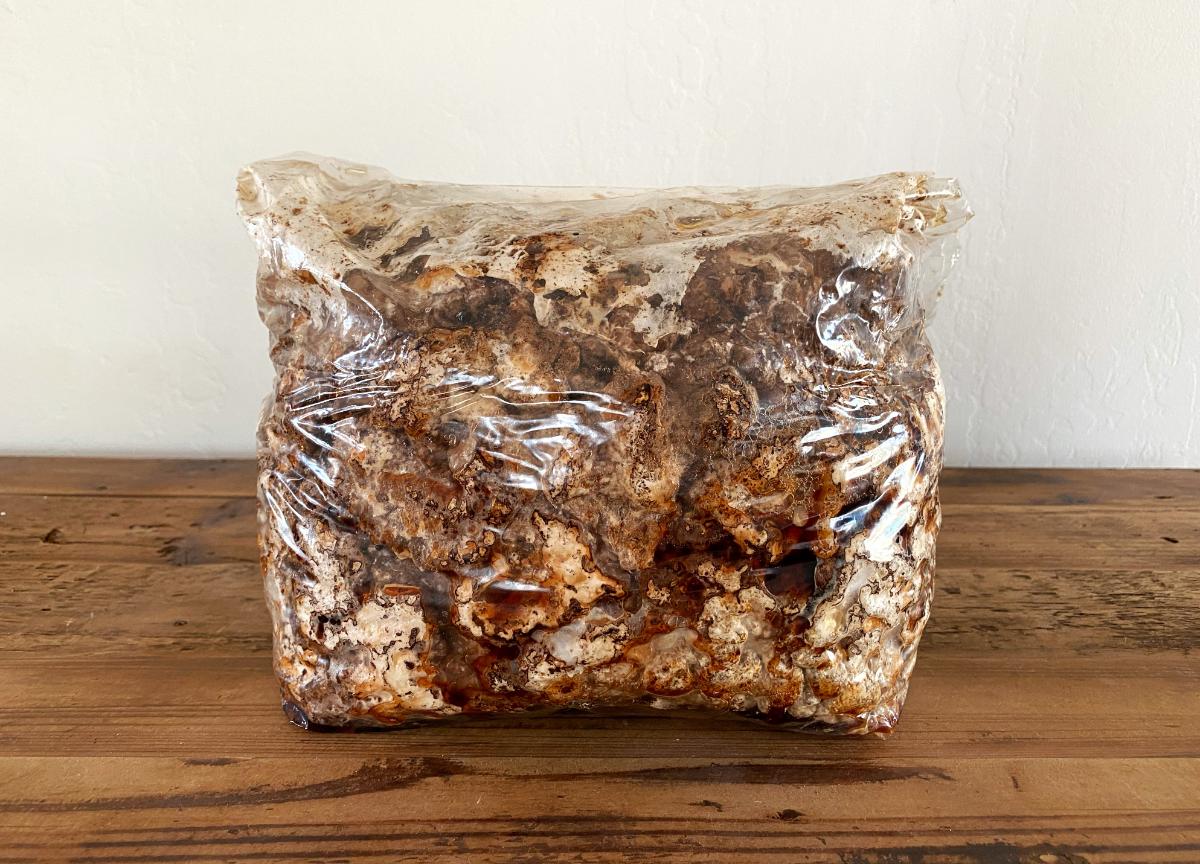
- Put the blocks into a clean container. A lidded tote bin or plastic storage box works great. Incubate them at around 55°F and 75°F and 80-95% humidity while the mycelium spreads off the grain spawn and grows throughout the substrate. You can also cover them with a humidity bag (a simple see-through bag tucked around the block is usually enough) instead of putting them in a tote bin.
- The inoculated bags should be in the dark at this time. Light will mess up the process.
- Make sure to leave enough space between each bag so that popcorning can happen properly. If the bags are touching, the popcorn growth won’t form, and that part of the block won’t fruit.
- Leave them alone except for every other day water misting (or as needed). The mycelium creates water as it grows and metabolizes. This self-made moisture helps growth continue, but you might need to add humidity based on your environment.
- Shiitake mushrooms do not react well to changes in temperature. If the temperature drops significantly during incubation, the blocks may start to produce mushrooms too soon, resulting in misshapen mushrooms and less yield.
- Shiitakes are also sensitive to being disturbed. After 4 or 5 weeks, handle the bags as little as possible until they are ready to fruit.
- Clean conditions are a must for indoor growing. Check often for any signs of contamination or mold. Move affected bags away from others right away if you spot any problems.
- Temperature control will make or break your shiitake growth. Your bags need temperatures between 73°F and 75°F during incubation. The mushrooms can still develop well between 55°F and 75°F. Temperatures above 75°F can overheat the inside and damage your mycelium growth.
- Humidity is vital during colonization. Keep levels between 85% and 95% so your bags don’t dry out. Good airflow prevents carbon dioxide buildup that can slow down mushroom growth.
- The bags can usually last up to six months before the substrate starts breaking down.
Checking for Colonization
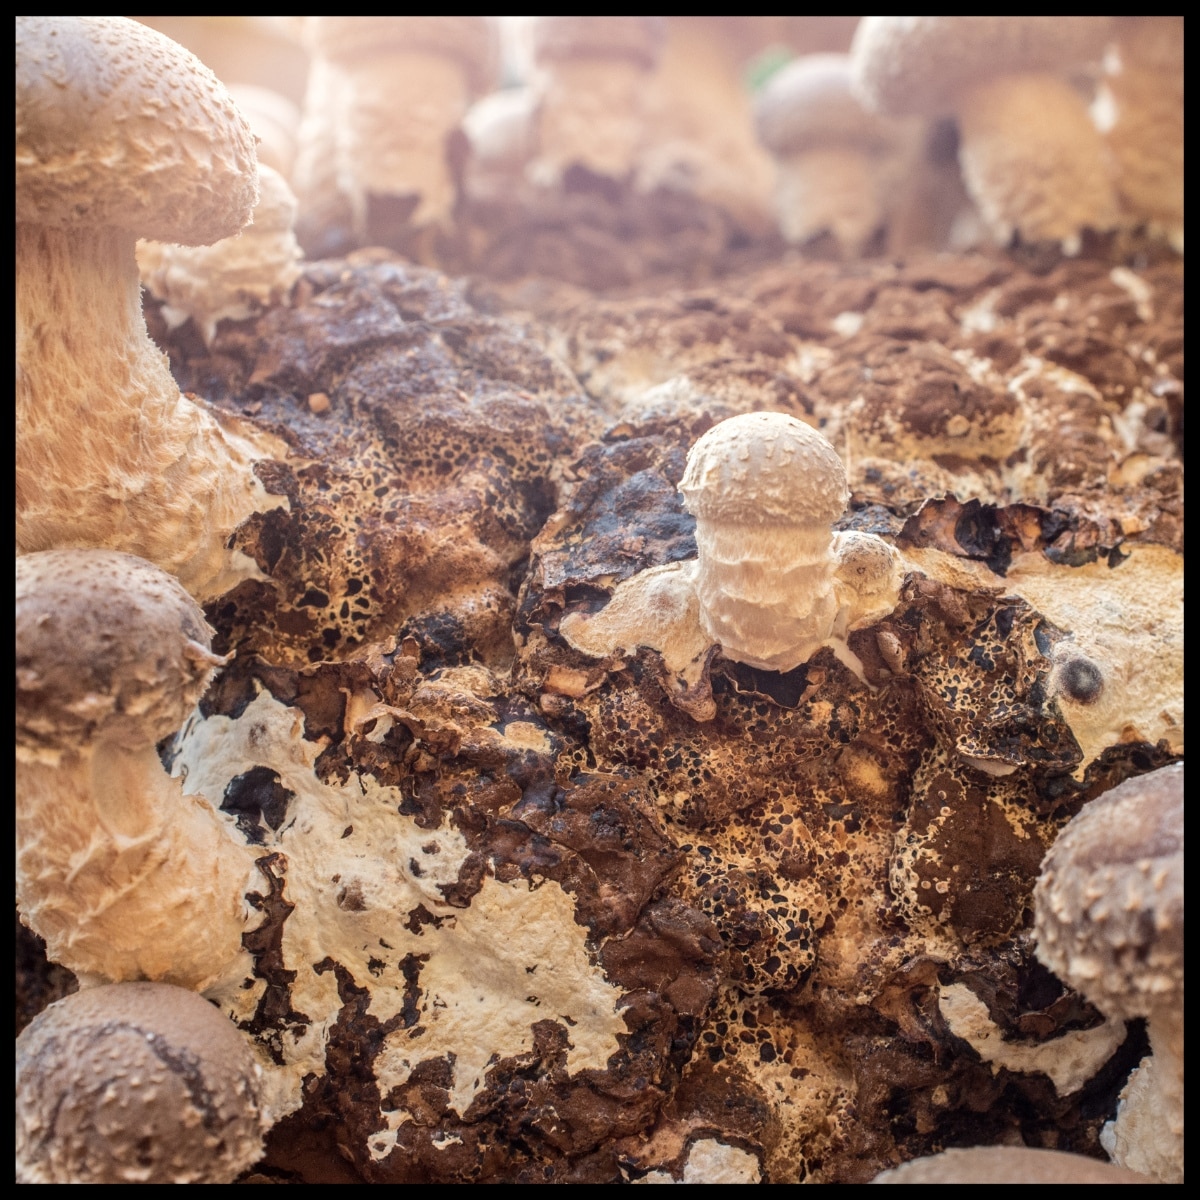
The colonization process of shiitake mushrooms requires patience and careful observation. It usually takes around 7-8 weeks for the shiitake blocks to fully mature, but sometimes it can take longer. You’ll know they are ready to produce mushrooms when the outside of the block looks like popcorn and turns brown.
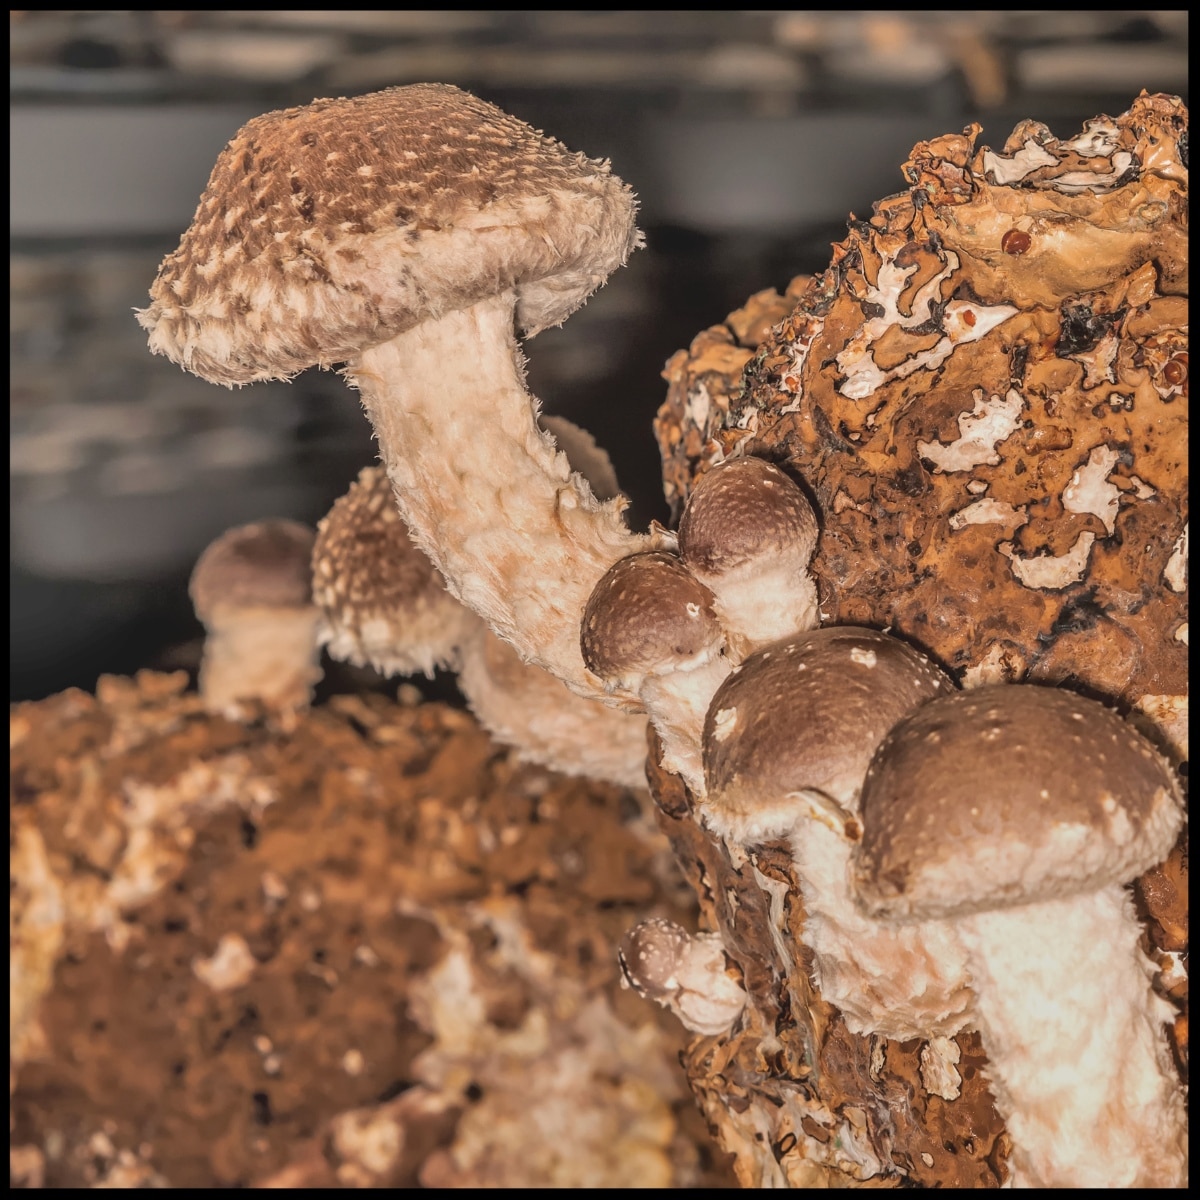
Shiitake does not form pins (baby mushrooms) straight away like oysters and other mushrooms do. Instead, the mycelium consolidates and forms large bulbous knots of mycelium referred to as “popcorning.” These popcorn formations will eventually lead to pins.
The block will begin to change color, with significant parts (sometimes all of it) turning brown. Some new growers might mistake this for contamination, but it’s actually the desired outcome.
During the growing process, the mycelium goes through three stages.
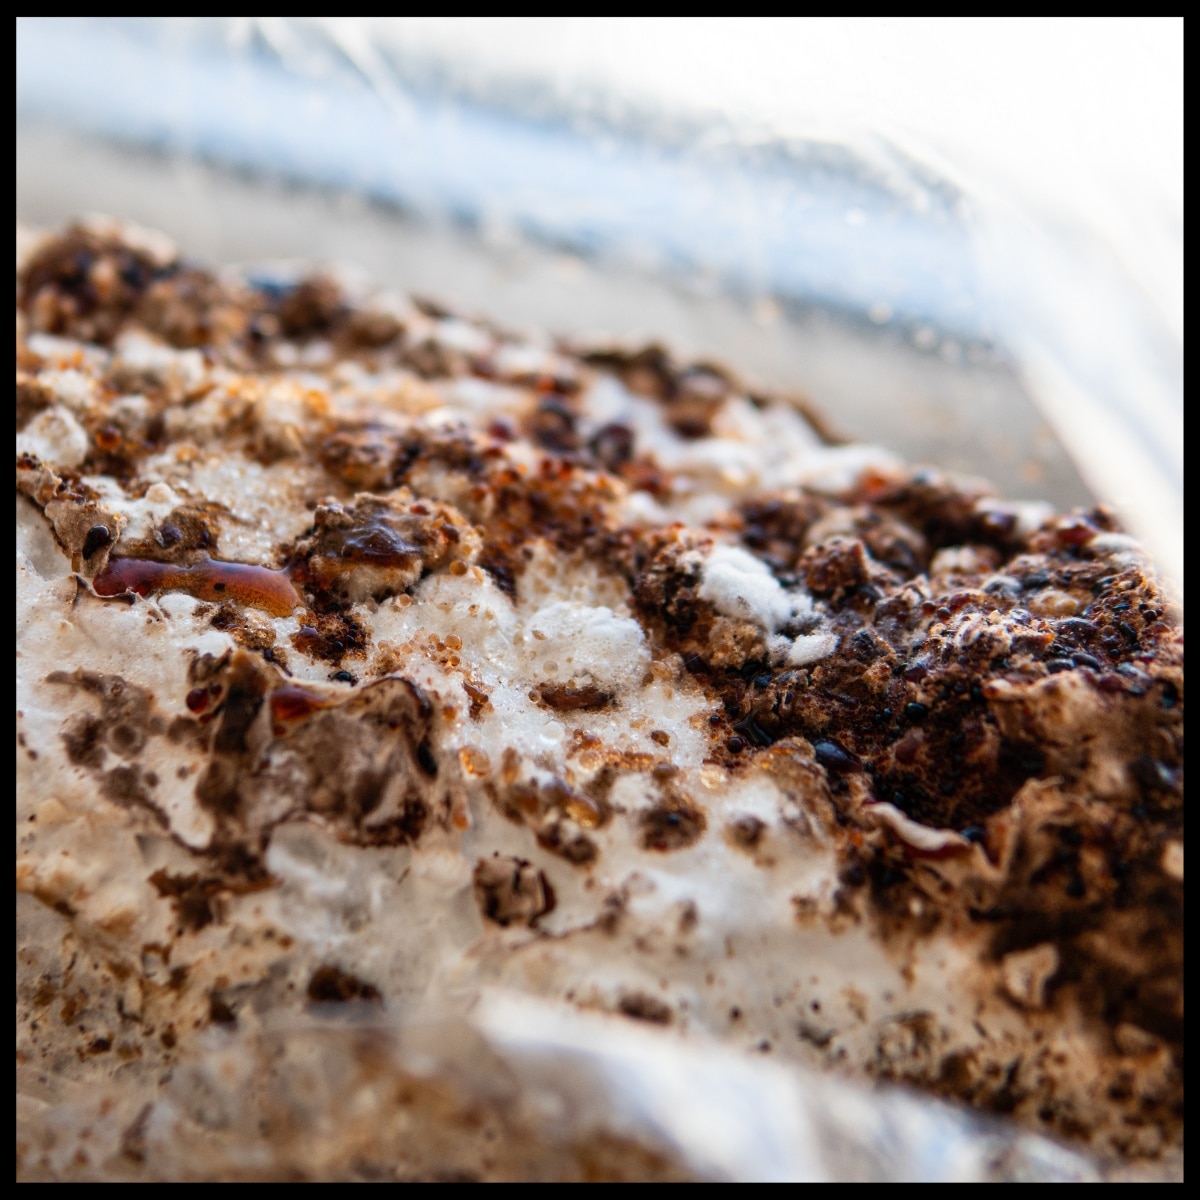
- First, it spreads throughout the new substrate. It is all white at this point.
- Then, popcorning happens, creating a textured surface with bumps and valleys. The popcorning stage is exactly what you’d expect – it gives the substrate an extremely bumpy appearance.
- Finally, the outer layer of the shiitake mycelium changes to brown. It forms a skin-like surface where the mushroom pins grow and emerge.
The mycelium network becomes strong enough to handle fresh air once colonization finishes. Your substrate should feel firm and look evenly colonized at this point. Early exposure can lead to contamination and lower yields, so take your time during this phase.
How To Prompt Shiitake Mushroom Fruiting
When the mycelium has completely covered the substrate, it needs a trigger to start producing mushrooms. For shiitake mushrooms, this usually happens with a change in temperature.
Fruiting shiitake mushrooms can be encouraged by gently smacking the blocks. This method is said to mimic a tree falling in the forest, which triggers mushroom growth naturally. You don’t need to hit the blocks too hard; just a firm smack on all sides should do the trick.
Cold Shock
To start the fruiting cycle for shiitake blocks, give them a cold shock. This means lowering the temperature of the block to about 35-40°F for 12 to 24 hours.
The easiest way to chill your fruiting blocks is to put them in the fridge. However, not everyone has a separate fridge for shiitake mushrooms. If that’s the case, you can try leaving them outside overnight, as long as it gets colder than 50°F in your area. Another option is to use a cooler with ice. You can also place them in a cooler spot in your house, like the garage floor or a cold room, to help with fruiting.
Shiitake mushrooms are different from other mushrooms because you remove the bag completely before they start to grow. After giving them a cold shock, let them rest in the bag for a day before taking it off. This helps them adjust to fruiting conditions. The high humidity inside the bag also helps start the original pins.
Fruiting Set Up
After the 13-24 hour cold shock, place the unwrapped mycelium block on a plate in a room with high humidity, moderate indirect light, and moderated temperatures. You can use a humidity tent (plastic bag wrapped around it) or put it back in the original tote bin with a cover.
It is good to water or mist the blocks thoroughly 2-3 times a day for the first 3 days of fruiting. Lift the humidity tent or tote cover a couple of times a day for 5-10 minutes to allow fresh air in.
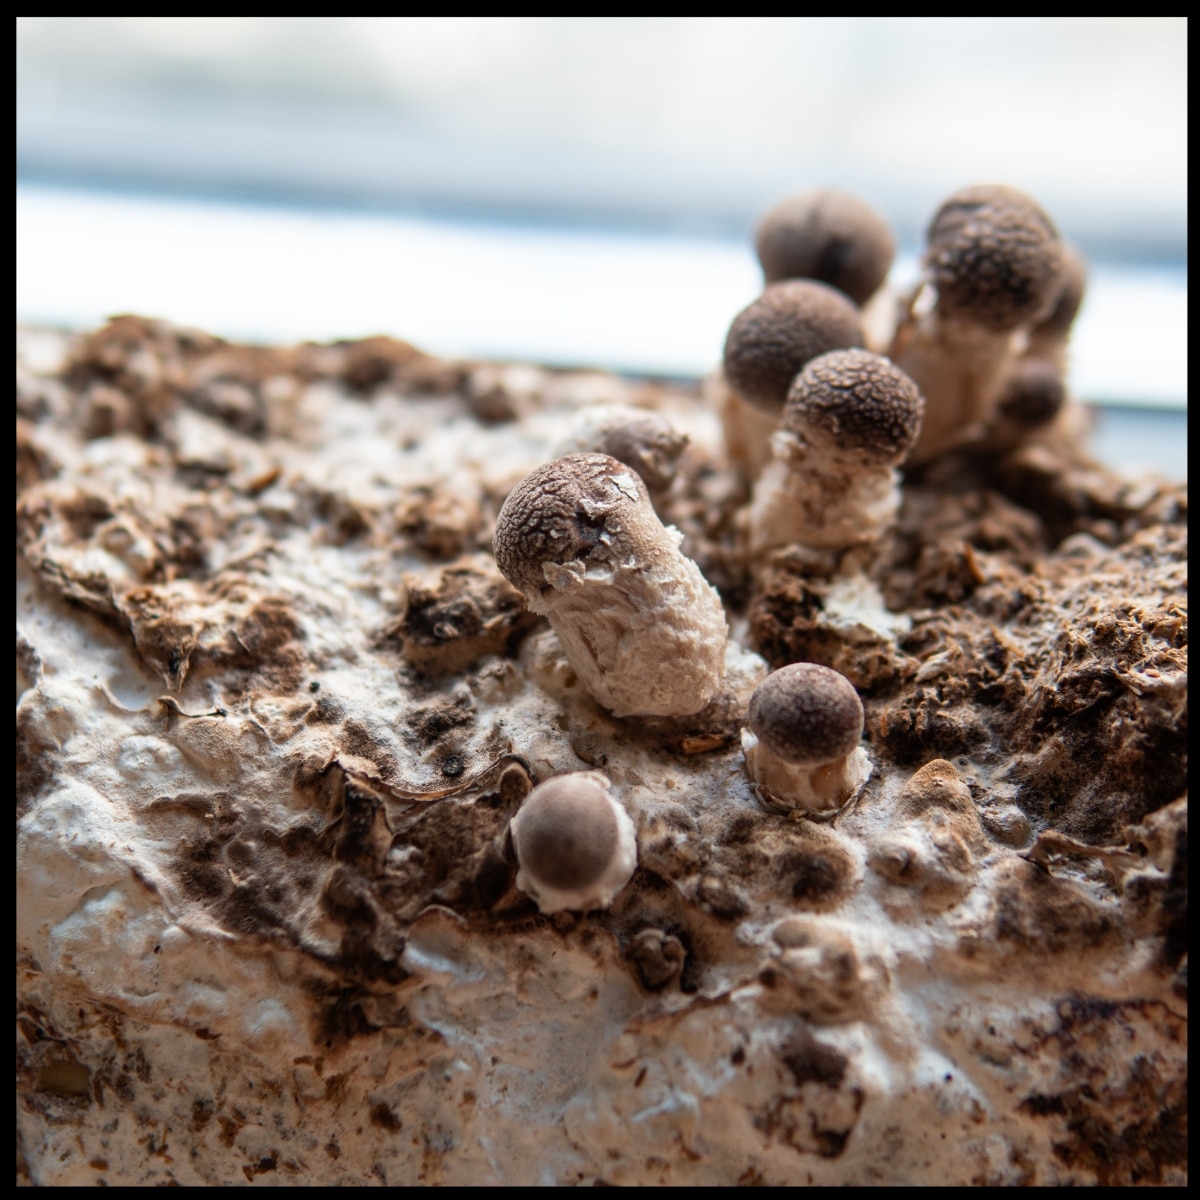
Pin Setting
During the first 4 days of fruiting, baby mushroom pins start emerging from the substrate. They show up first as cracks in the brown blobs of mycelium.
During pin-setting, monitoring these four key environmental parameters is essential.
- CO2 levels (air exchange) – below 1200
- lighting – mild, indirect light
- humidity – don’t let it drop below 70%; 80-95% is ideal
- temperature – keep between 55-70
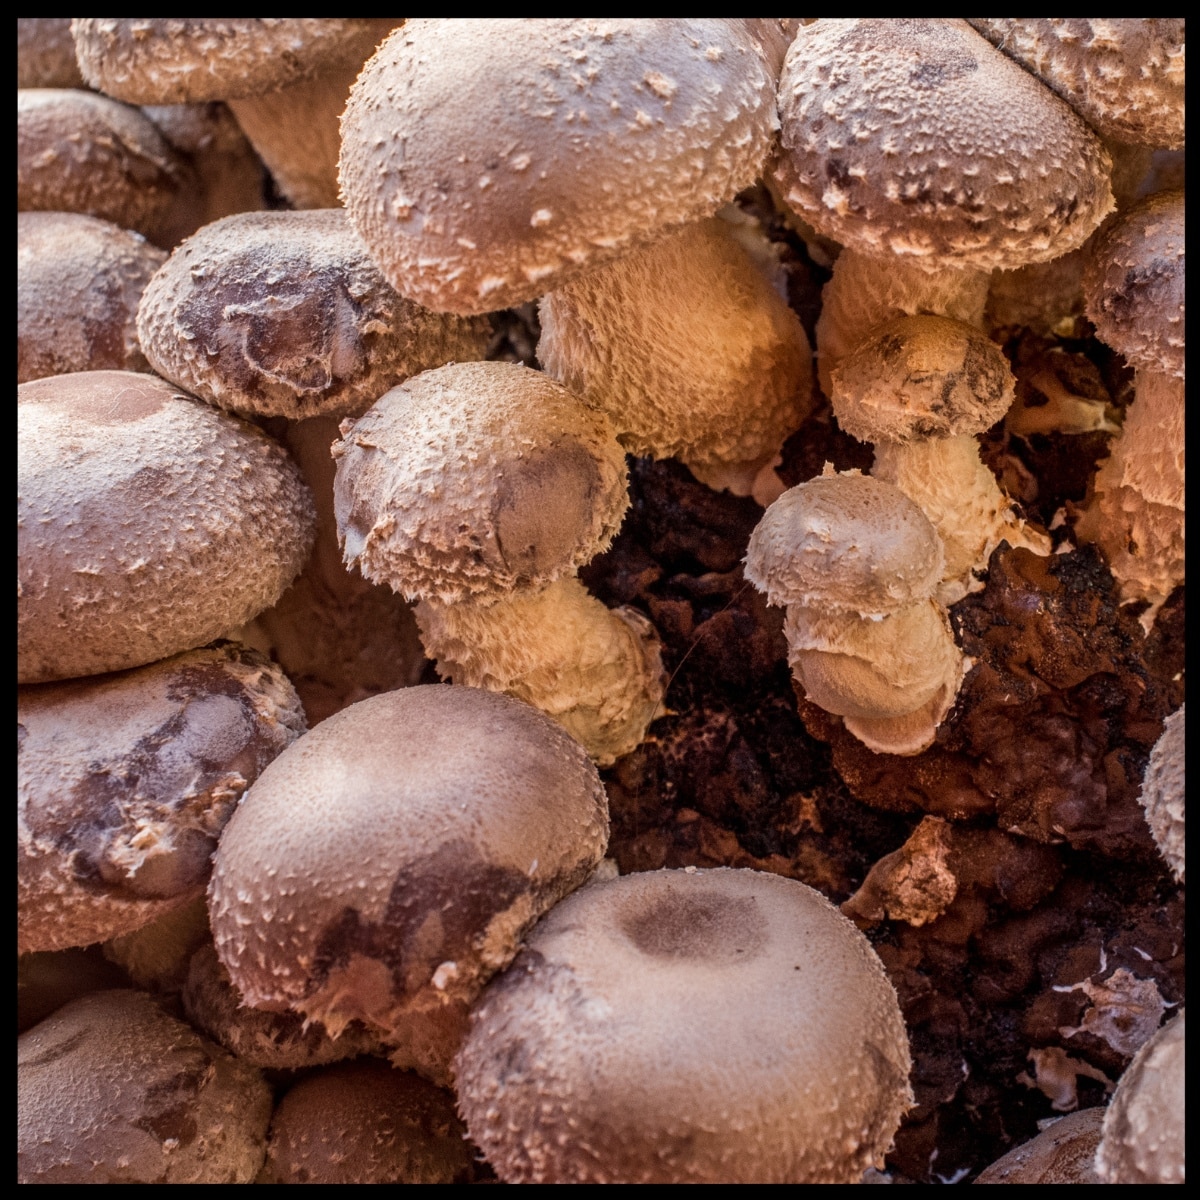
Mushroom Growth
Once the pins arrive, growth is rapid. Full-sized fruits develop in about a week. You’ll be able to see changes in the mushroom’s size daily as they grow.
The mushrooms don’t need as much humidity as at the early stages of growth. Keeping the same humidity and fresh air schedule is okay, though, and can still lead to good results.
Temperature greatly affects how quickly mushrooms grow and when you can harvest them. Mushrooms grow faster in warmer conditions and can become overripe in just 24 hours. After removing the outer plastic bag, you can expect to harvest mushrooms within one to two weeks.
Harvesting Your Mushrooms
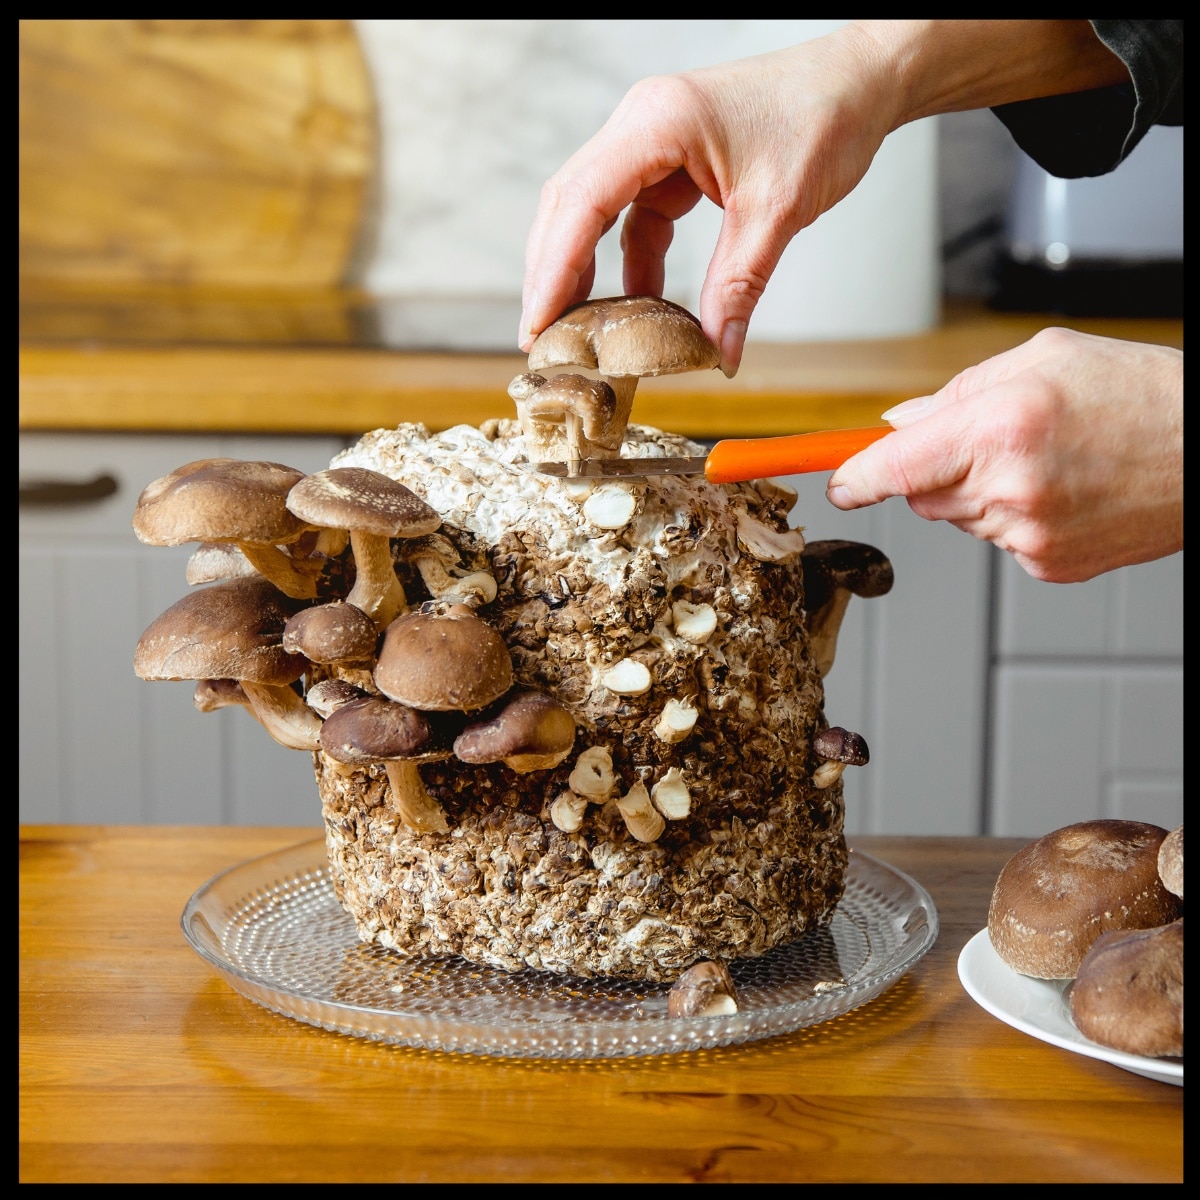
Shiitake mushrooms are ready to harvest once their caps open enough to show the gills underneath. The best time is when the mushroom caps are still slightly curled, and the veil underneath starts breaking away. To get a full picture, flip the growing block upside down to check the undersides of all mushrooms at once.
You just need clean, precise cuts to harvest shiitake mushrooms well. Cut the mushroom at the stem’s base with a sharp paring knife or clean scissors. This way prevents substrate damage and lowers contamination risks for future flushes. Cool the mushrooms right after harvesting to keep them fresh.
The harvest just needs clean hands and careful attention to protect the substrate. After each harvest, let the substrate rehydrate by soaking it in tap water for three days before it goes back to the fruiting room.
Storage Options
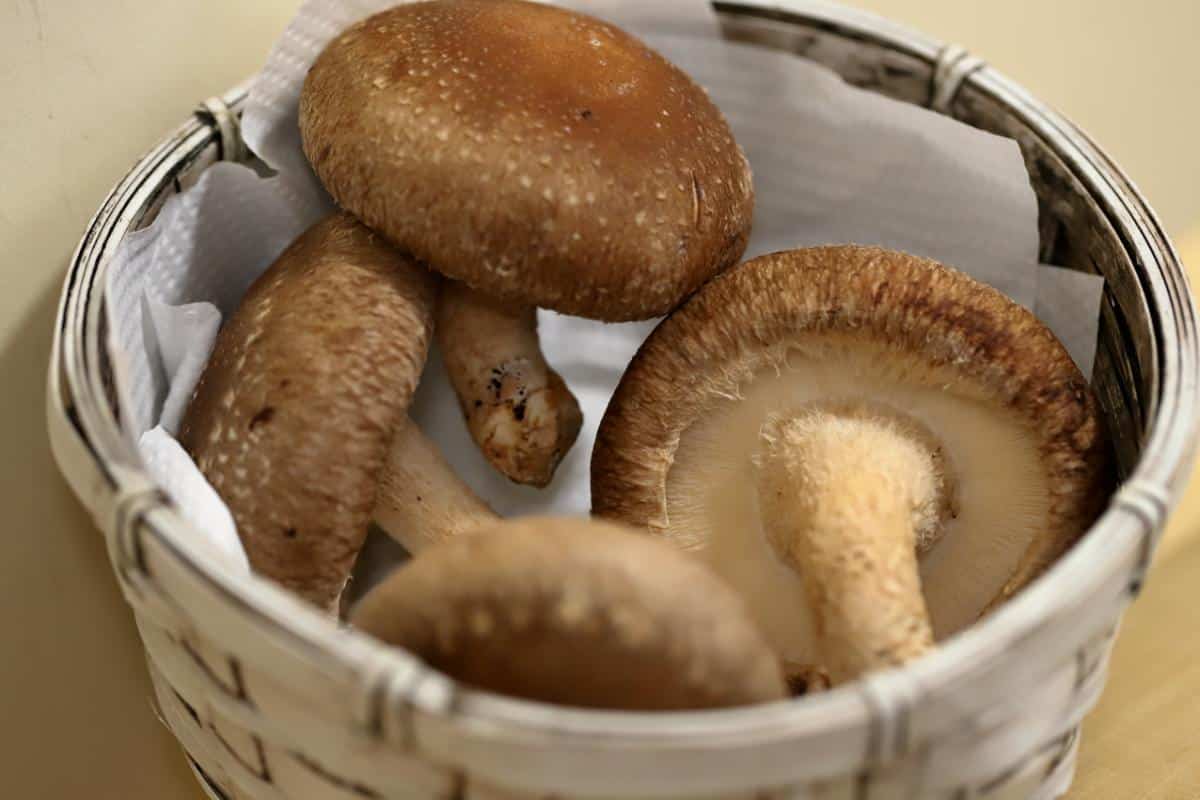
Shiitake mushrooms stay fresh and flavorful for several days with proper storage. Keep fresh mushrooms in a paper bag in the refrigerator at 41°F. Paper bags are a great way to get rid of extra moisture that could cause spoilage. You could also wrap them in a damp kitchen towel.
Long-term preservation methods:
- Freezing: Steam whole mushrooms for 5 minutes or slices for 3 minutes before freezing. They do not freeze well fresh.
- Drying: Use a dehydrator or air-dry in a mesh container for about a week
- Value-added products: Create dried mushroom products or sauces to extend shelf life
Keep an eye on stored mushrooms. Fresh shiitakes last 3-5 days in the fridge. Look out for signs of spoilage like sliminess, wrinkles, or dark spots. The mushrooms stay fresher if you don’t wash them before storage, and avoid sealing them in airtight plastic containers.
Steam or sauté mushrooms before freezing so they keep their texture. Freezing uncooked shiitake results in a soggy, unpalatable texture. Frozen shiitakes keep their quality for up to 12 months.
Dried shiitake mushrooms are also an excellent idea. These dried mushrooms come back to life nicely in soups, stews, and stir-fries while keeping their intense umami flavor.
Common Questions About Growing Shiitake Mushrooms In Bags
How long does it take for shiitake mushrooms to colonize the substrate?
The colonization process for shiitake mushrooms typically takes about 2-3 months. During this time, white, fluffy mycelium growth spreads through the substrate.
What temperature range is best for growing shiitake mushrooms?
The optimal temperature range for shiitake mushroom growth is between 60°F and 65°F (15.5-18°C). However, temperatures between 55°F and 75°F are generally acceptable for healthy development.


Leave a Reply