Drying mushrooms is a wonderful way to preserve them for long-term storage. Maybe you collected a boatload of morels on your last foray, or perhaps you couldn’t resist the crazy shiitake sale at the grocery store. If you have more fresh mushrooms than you can use, save money and heartache by drying them!
Learning how to dry mushrooms is easy. There are a number of different methods, usually focusing on heat and moving air. I’ll discuss a few of them here so you can decide which one is best for you and your situation.
To prepare your mushrooms for drying, it’s important not to waterlog them first. Too much moisture and drying become tedious to impossible. If they’re dirty, wipe them off with a damp cloth first rather than soaking them in water.
Jump to:
Basics of Drying Mushrooms
There are a few other things to keep in mind:
Use the lowest setting needed to dry them. High heat can destroy some of the beneficial compounds in some mushrooms, so for drying mushrooms use lower settings rather than just roasting them.
- Mushrooms should be cracker dry, meaning they snap easily and break apart like a dry cracker. If they still seem moist or bend rather than snap, it’s best to keep drying. Mushrooms that still contain some moisture may rot or develop mold.
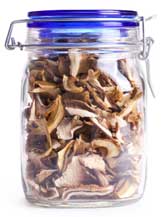
- After drying mushrooms, store them in an airtight container in a cool, dark place. Don’t leave them out in the open, in direct sunlight, or anywhere wet.
- If using wild mushrooms, always make sure you know what you’ve picked before consuming them. Poisonous mushrooms can still hurt you, even after they’ve been dried.
- Be careful if you’re allergic to mushroom spores. Heat and moving air may cause spores to disperse throughout the room, so if you find yourself having a reaction (respiratory or a rash) please move them to a different location or just abandon the project and buy some dried mushrooms. It’s not worth your health, no matter how delicious.
Perfectly dried fungal treasures will keep for years, so let’s learn how to dry mushrooms!
Food Dehydrator
Drying mushrooms with a food dehydrator is an easy method that doesn’t require a lot of babysitting. Depending on how many racks you have, you can dry more mushrooms in one go. Keep in mind that the more mushrooms you try to dry at one time, the longer it may take.
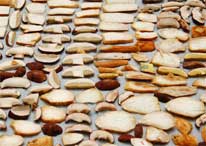
- Cutting them up will make them dry quicker and easier. You can either slice them into 1/2-inch pieces or, depending on the shape, you can cut them right down the middle.
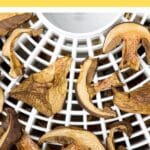
- Arrange the mushrooms on the drying racks and assemble your dehydrator. Arrange the pieces, but don’t pack them so tightly that they’re sitting on top of each other.
- I like to dry continuously on a lower setting, no higher than 150 degrees (135 is a good compromise). Sure it may take a little longer, but you don’t have to play around with the temperature and there’s less risk of damaging your mushrooms.
- Check on them every few hours and remove them when they’re cracker dry. Depending on how many you have, this may take a while and some may dry faster than others.
You may balk at the expense of a food dehydrator, but I think they’re great. Ultimately they can save you money, as you can make a lot of snacks cheaper than you can buy them. And they’re fun!
The Oven Method
If you can’t afford a dehydrator, you can easily learn how to dry mushrooms with your oven. The basic idea is the same, applying external heat to get rid of moisture. Again, you don’t want to bake them too hot or you risk burning off some healthy compounds or just making them charred and gross.
- Preheat your oven to 150 degrees.
- Slice the mushrooms into 1/2-inch pieces or, depending on the shape, you can cut them right down the middle.
- Arrange them on a baking pan or sheet that is NOT oiled. Don’t pack them so tightly that they’re lying on top of each other.
- Place the sheet (or sheets, if drying a large batch) in the oven and cook for one hour, making sure to leave the oven door slightly ajar so moisture can escape. After the hour, pull them out, flip them over, and cook for another hour. Continue this process until they’re all dry.
This method of drying mushrooms requires more babysitting than having a dehydrator, but you don’t have extra expenses and it allows you to try bigger batches at one time. Just don’t forget they’re in your oven!
Sunny-Side Up
Using the sun is another way of drying mushrooms. It’s easy, free, and doesn’t require any electricity. Sure it takes a lot longer, but it also is the best method for preserving flavor and potency.
It’s important that you have the right environment to do this. If you’re someplace really humid, your treats will rot instead of dry. You don’t have to be at the equator, but you do need a sunny, non-humid area.
- Choose a good spot for drying mushrooms. It can be a room that gets a lot of sun, a flat roof, or a windowsill. Make sure it’s protected from moisture, insects, and animals. You also want it to have some airflow, so a stagnant, closed off room isn’t a good choice.
- Slice the mushrooms into 1/2-inch pieces or, depending on the shape, you can cut them right down the middle.
- Lay them out in your area, taking care not to stack them on top of each other.
- Let the sun do its thing. Check them a few times throughout the day to see how they’re doing. It may take a day or two to dry.
Depending on your environment, there’s a good chance your mushrooms will never get fully dry. You’ll realize this if, after two days or so, they’re mostly dry but still flexible or have a “rubbery” feel to them.
If this happens just finish them off in an oven or dehydrator. Check them frequently, as it won’t take them long to fully dry at this stage.
The Box Fan
A box fan is another great mushroom drying tool, the idea being that moisture is continually wicked away by moving air. This is a perfect partner to the sun drying method.
- The directions are easy. Simply set everything up as you would if drying in the sun, and place a box fan near your mushrooms.
- Set the fan on the highest setting and as close to the pieces as you can. Just don’t blow them away!
- The moving air will dry the mushrooms. Check them throughout the day to gauge their moisture content.
Again, this method may not get your mushrooms cracker dry, so you may have to briefly finish them off with a heating element if you’re planning on long-term storage. Yet by combining a fan and a good, sunny room with low humidity, you should have a lot of drying success.
Other Methods for Drying Mushrooms
This isn’t an exhaustive list, of course. All you really need for drying mushrooms is some heat and/or air circulation so use your imagination if you need to. Here are some other methods:
- Hang them in a sunny area by stringing them up with a needle and thread, not unlike a Christmas garland. I’ve heard of lots of people doing this, but it sounds like way too much work for me.
- Place them in a container on some sort of rack with a desiccant-like silica gel underneath. Desiccants remove moisture from the air, so you’ve probably seen little packs of them in vitamins before. Note that your mushrooms should NOT touch the actual desiccant; it’s not safe to eat!
- Some people simply put their mushrooms in a net produce bag and hang them somewhere dark and dry. Make sure to move them around a little every day and don’t pack them in too tightly. A blowing fan can really speed things up, but note that a damp room will result in moldy mushrooms

So what do you do with dried mushrooms? Reconstitute them in boiling water for 20 – 30 minutes, or simply grind them into a powder for a delicious addition to soups and stocks. The possibilities for drying mushrooms are endless.
By now you may be wondering, which method do I recommend? They all have their advantages, although in my opinion, unless you have a mountain of mushrooms to dry, nothing beats a food dehydrator!


 Use the lowest setting needed to dry them. High heat can destroy some of the beneficial compounds in some mushrooms, so for drying mushrooms use lower settings rather than just roasting them.


Leave a Reply