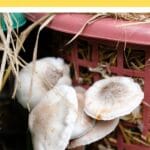
Learning how to grow mushrooms is a fun and rewarding experience. This article shows you an easy way to grow your own mushrooms at home. The substrate we’ll be using is straw, which is inexpensive and easily available.
Straw makes a good substrate because it is both nutritious and easy to break down. Cereal straws such as wheat or rye are best. I buy mine in large bales for under $10 at my local garden and feed store.
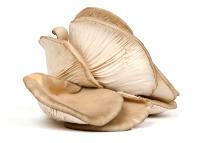
You can cultivate many different types of mushrooms on straw such as enokitake, the garden giant, certain Agaricus species, and oysters. Growing oyster mushrooms is often easiest for the beginner, and I’d recommend this if you’re just starting out.
Of course, we’ll need to start with some preparation before we move on to the step-by-step how to guide. After you’ve read through those, review the tips section to maximize your success.
Let’s learn how to grow mushrooms!
Jump to:
“Chance Favors the Prepared Mind”
Louis Pasteur stated this, although I don’t think he was referring to mushroom growing specifically. Yet his namesake process of pasteurization is important to know when learning how to grow mushrooms.
Pasteurization is simply the process by which amounts of microscopic competitors in a substrate are reduced. This can be achieved in a number of ways. Milk is often pasteurized, and straw can be too.
Why do we want to pasteurize our straw before growing oyster mushrooms? It gives mycelium a chance to take over a substrate quicker by reducing the amount of harmful competitor organisms.
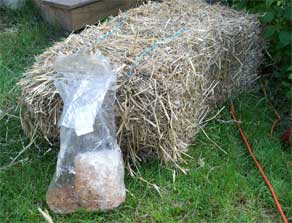
Mycelium is the vegetative growth of the fungus. If you give it what it needs, it will produce lots of delicious mushrooms for you!
The steps below include low-tech instructions on how to pasteurize straw using a steam bath. To learn different methods see the pasteurize straw page.
Another thing you’ll need to be familiar with before we begin is the concept of mushroom spawn. Mushroom spawn is simply any substance that has been inoculated with mycelium.
You can purchase mushroom spawn over the Internet or from a local cultivator. It often comes in the form of sawdust, but you may see wood chip or grain spawn as well. See the mushroom spawn page for a more in-depth article.
We’ll use the spawn to inoculate the pasteurized straw. Mycelium will grow through the straw, and hopefully produce mushrooms.
All set? Understand the basic concepts of pasteurization and spawn? Then let’s learn how to grow mushrooms on straw!
How to Grow Mushrooms: Step by Step
We’ll break the process into three main sections: pasteurization, inoculation, and waiting (the hardest part!)
Pasteurization
You’ll need:
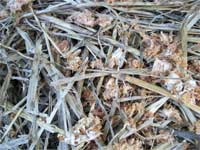
Some straw (enough to fill at least a few medium-sized plastic bags)
- Wood chipper or lawn mower
- Propane burner, wood fired oven, or other consistent heat source
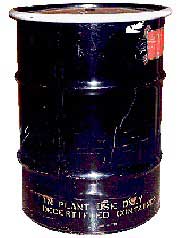
- 55 gallon drum or other large, food-grade container (CLEAN! Not one used to store anything toxic at any point)
- Large mesh basket or laundry bag
- Thermometer
- Common sense (you’ll be working with heat sources and heavy materials so be careful!)
Pasteurization occurs between 160 and 180 degrees Fahrenheit. Higher temperatures will result in you killing good bacteria and allowing the bad to bloom. With a water bath, you pasteurize by soaking the straw in 160-degree water for an hour.
Don’t skip the first step! Mycelium will colonize smaller pieces of straw much faster and easier.
- Prepare your straw by cutting it into 1 to 3 inch pieces with your wood chipper or lawn mower. Doing this by hand will take forever and hurt like hell after a while, so don’t even try.
- Set up your container so it’s sitting on top of your heat source. Fill it halfway with clean water.
- Heat the water in the barrel until it stays between 160 – 170 degrees Fahrenheit. Use a long thermometer to measure the temperature.
- Put the straw in the laundry or wire mesh basket. Submerge it in the hot water for one hour, keeping an eye on the water level and temperature. You may have to put something heavy or a lid on top of it to keep it submerged.
- After an hour, remove the straw and lay it on a clean table or plastic tarp to cool and drain. Make sure the straw has cooled to below 100 degrees before use.
Note that the wet straw will be very hot and very heavy. Depending on the amount you use, lifting it out of the barrel may be a two-person job. You may want to tie your bag to a long branch so it’s easier to lift out of the water.
Be sure to allow the straw time to drain and cool! If it’s too hot it could kill your mycelium, and your first attempt at learning how to grow mushrooms will fail right out of the gate.
If this sounds too labor-intensive you can do this process on a much smaller scale using a pot and a burner on your stove. See the pasteurization page for more details.
Inoculation
The step is one of the easiest parts of growing oyster mushrooms. Now we’re going to mix the spawn in with the pasteurized straw. Before you do this, make sure your straw has drained and is cool enough to use (below 100 degrees Fahrenheit).
You’ll need:
- Pasteurized, cooled straw
- Mushroom spawn
- Food-grade plastic bags (I like oven bags)
- A clean nail or something sharp
- Twist ties
When your straw is ready, follow these simple steps:
- Lay the pasteurized straw out on a clean table or tarp. Break up your mushroom spawn into small pieces as you mix it into the straw. This isn’t an exact science; just try to mix it thoroughly and evenly.
Fill each bag with the inoculated straw. Pack it well, but not so tightly that it’s a compressed block. Try to squeeze as much air out of the top as you can before you twist the opening and secure it with a twist tie.
- Poke holes on the sides of the bag every few inches. Mushrooms will grow out of these holes.
According to Paul Stamets in his excellent book Mycelium Running: How Mushrooms Can Help Save the World, you can make between 20 and 40 bags weighing 6 to 8 pounds each from approximately 8 pounds of grain spawn.
I’ve found this to be pretty accurate. Use these numbers when roughly trying to figure out how many bags you’ll make from how much spawn and straw you have.
Waiting
You’ll need:
- Time
- Patience
- A spray bottle with some clean water
The waiting stage consists mainly of monitoring your straw bags. Knowing what to look for is another important aspect of learning how to grow mushrooms.
- Hang your bags in a cool, dark place so the mycelium can incubate. Between 60 to 75 degrees Fahrenheit is good for most species.
- Don’t disturb the bags during this time period, but do check them to make sure that the straw isn’t getting too dry. If it seems bone dry, mist it a few times a day through the holes.
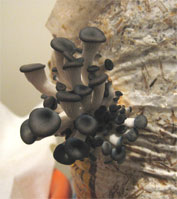
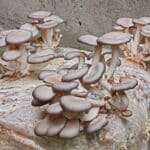
After 2 to 8 weeks you’ll see that the white mycelium has colonized most of the straw. Mushrooms may start appearing on their own at this point, or you may need to initiate fruiting by providing them with a little light (NOT direct sunlight, any light by which you could read is good enough).
- Start picking those babies off your bags and enjoy! You’ll probably get more than one flush from a bag, so after it’s done water them thoroughly and let them rest in darkness for round 2. Continue until the bag stops producing mushrooms or mold has set in.
It may seem like a lot of stops when you’re first learning how to grow mushrooms but after a few times you’ll have your technique down pat.
At that point you may want to refine and learn new things. I’d recommend both Mycelium Running: How Mushrooms Can Help Save the World and Growing Gourmet and Medicinal Mushrooms
by Paul Stamets for more information on how to grow mushrooms.
How to Grow Mushrooms: Tips for Success
Just a few things to keep in mind:
- Pay close attention to the moisture level in your straw bags. Too dry and your mycelium will die; too wet and mold will start to grow. If you see a lot of standing water, poke some extra holes in the bottom for drainage.
- When growing oyster mushrooms and most other species, the mycelium is a white color. If you see large patches of red, black, blue, brown or green then you’re looking at mold. As painful as it is, you should discard your bag as you could make yourself sick.
- You don’t need complete sterility for this method but do pay attention to cleanliness. Wash your hands, lay your straw out on a clean tarp, and don’t hang your bags over the cat litter box.
Research the species you want to grow before you begin. Some do better on wood than straw. Others may need a certain temperature range for incubation. Knowing these specifics will increase your success rate.
- Be cautious when pasteurizing straw on your own. The burner is hot, and wet straw is very heavy. Asking a friend to help will make it more fun and be safer. Bribe them with the promise of delicious mushrooms.
- Some people mix some leached cow manure in with the straw and spawn. Most mushrooms thrive on this. Use a ratio of about 3:1, or three parts straw to 1 part manure.
- Don’t be discouraged if nothing happens your first time. Everyone fails at this at one point or another. Read some more and refine your methods. Try, try again!
I sincerely hope this article has helped you learn how to grow mushrooms on straw. This is an interesting activity that almost anyone can do.
The method outlined here is pretty low-tech. There are many other ways to grow your own mushrooms, each with their own advantages and disadvantages.
So keep reading, keep trying, and most of all: have fun!

 Some straw (enough to fill at least a few medium-sized plastic bags)
 Fill each bag with the inoculated straw. Pack it well, but not so tightly that it’s a compressed block. Try to squeeze as much air out of the top as you can before you twist the opening and secure it with a twist tie.
 After 2 to 8 weeks you’ll see that the white mycelium has colonized most of the straw. Mushrooms may start appearing on their own at this point, or you may need to initiate fruiting by providing them with a little light (NOT direct sunlight, any light by which you could read is good enough).

Leave a Reply